Introduction to Node.js
Goals
By the end of this lesson, you will:
- Know what a server is and how requests and responses are handled using the Node
httpmodule - Be able to articulate the differences between client-side JavaScript and server-side JavaScript
- Understand how the client and server relationship works
- Be able to build a simple HTTP server
- Know which appropriate RESTful method to send in a request
Intro to Node.js and Server-Side JavaScript
Even as a front-end developer, it’s important to have a basic understanding of what’s going on behind the scenes in the back-end. You’ll often be working with back-end developers on your team that will have a huge effect on how your application interacts with its data. The better you understand the back-end, the more prepared you’ll be to build an application on top of it.
The Server
A server is simply a computer or program that handles sending, retrieving, and manipulating resources for a client. There are many different types of servers, but when we build web applications, we’re most concerned with what’s called a Web Server or an HTTP Server. You’ll often hear these two terms used interchangeably or simply shortened to ‘server’.
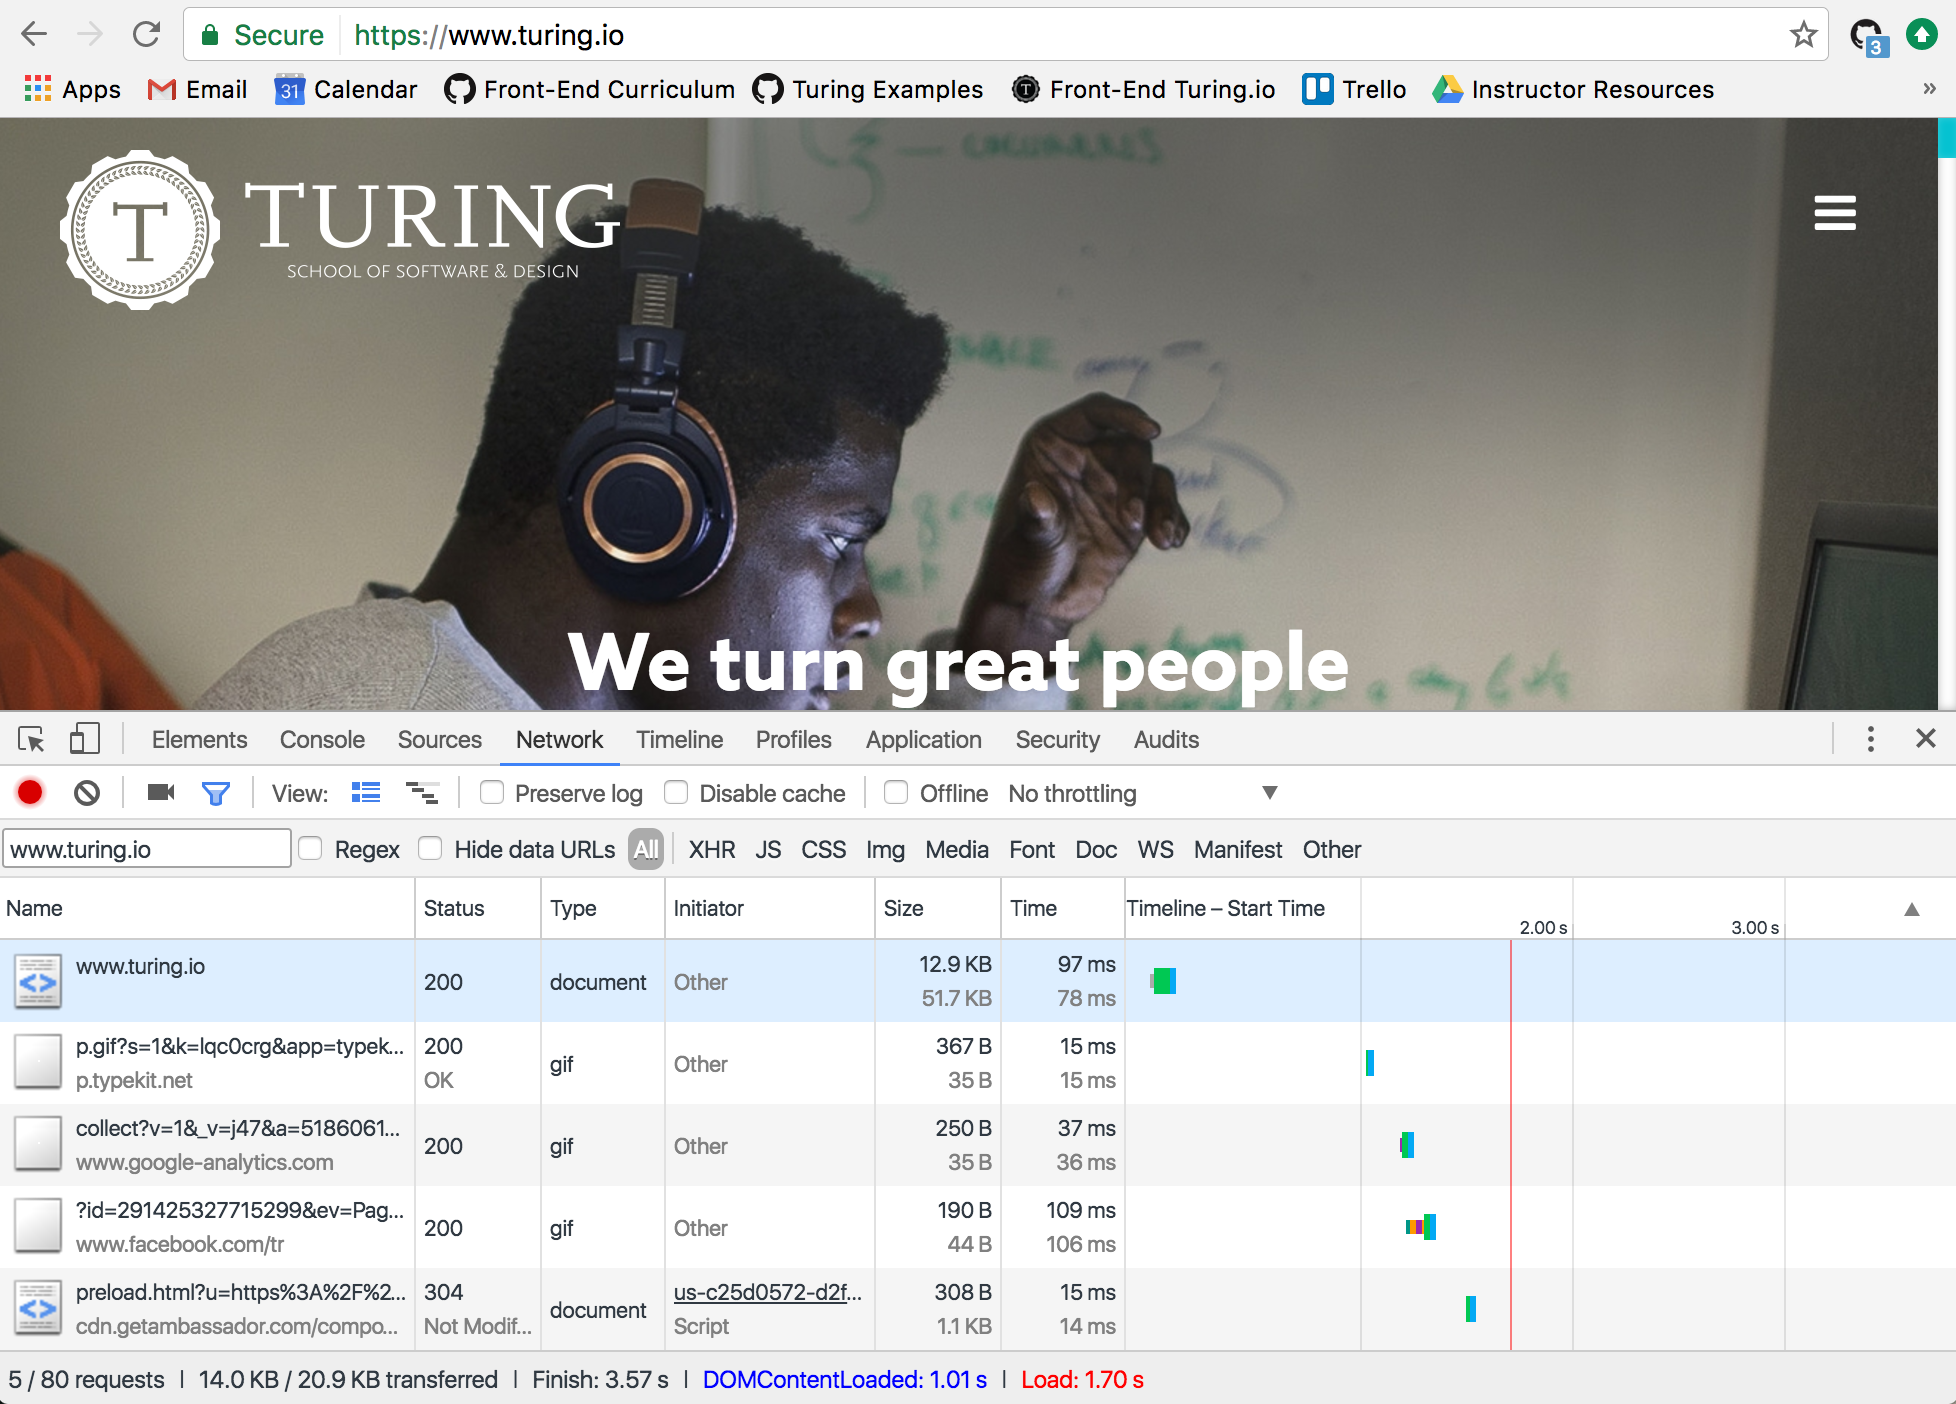
An HTTP Server handles any network requests by providing responses that can be HTML pages, files, data, etc. For example, when we navigate to https://www.turing.edu/ in our browser (Web Client), we are really making a request to an HTTP server. The server is then responding with all of the HTML needed to render the page. We can even visually see this by looking in the Network tab of our developer tools:
Open the Network tab, navigate to https://www.turing.edu/, and you can see the requests and responses.

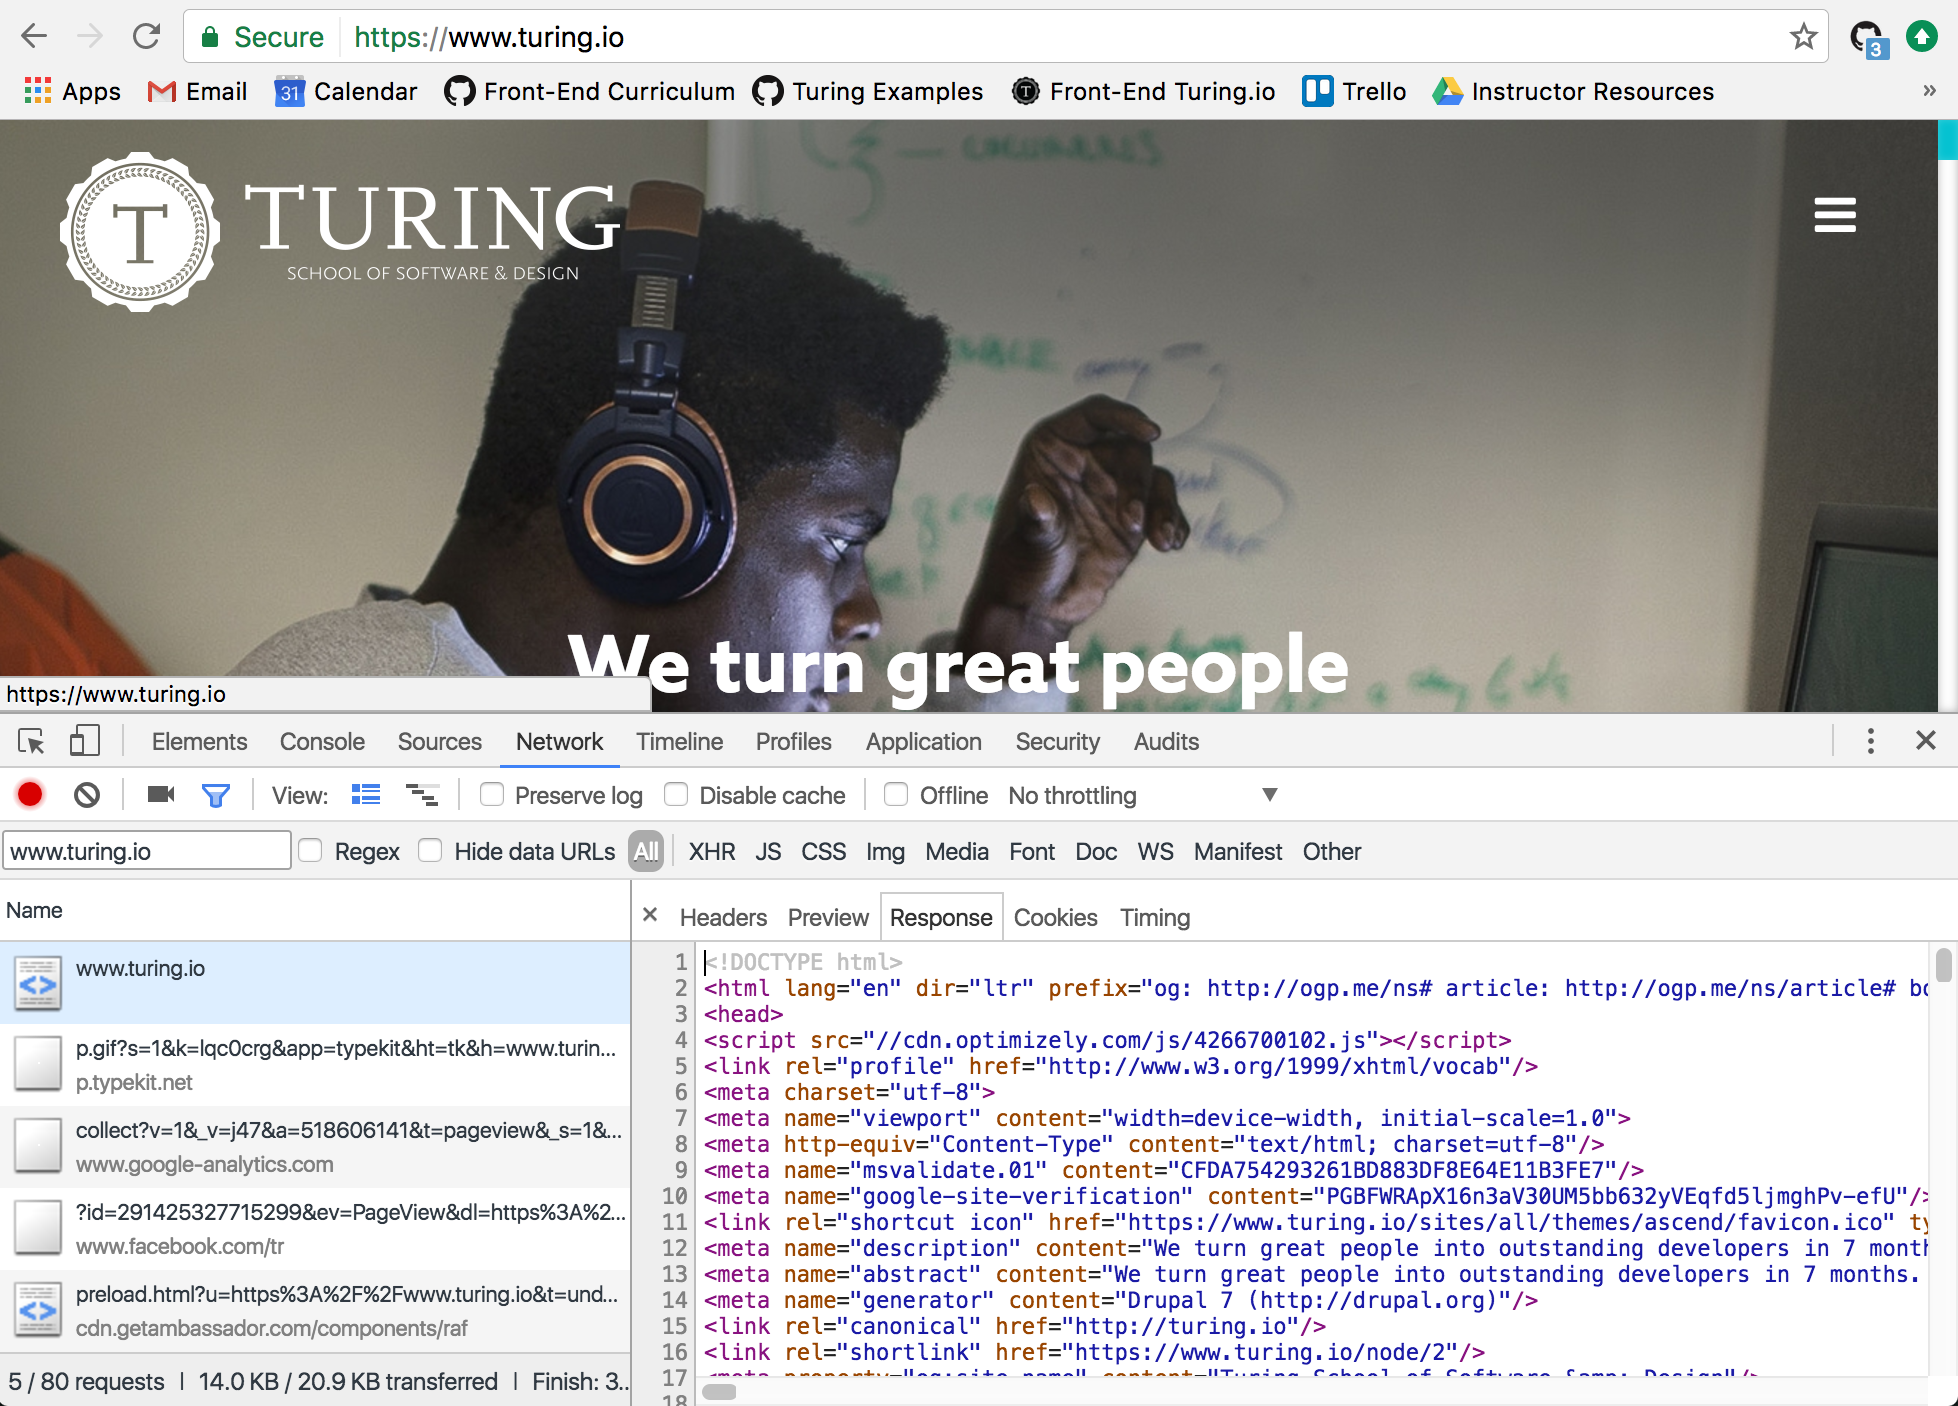
The Network tab will list any requests you make to a server. If we search for www.turing.edu, in the top left of the network panel, we can see that the type of request we made was for a document. Select that request, and you can also see detailed information about the request itself, as well as the response that was given.
Click on the Response tab, and you’ll see the entire markup of the HTML document we requested:

Backend Frameworks
Unlike the frontend, where the main language used is JavaScript, the backend can be built in PHP, Python, Ruby, etc. Developers have built frameworks for building backends with each of these languages (CakePHP, Django, Ruby on Rails, etc.). So while deciding on a frontend JavaScript framework is more about preference and opinion, your choices for a backend framework are often limited to the language you choose to write. Whatever language and framework is chosen for the backend of an application should have little effect on the frontend, as the only interface for communication between the two is requests and responses through URLs.
For the following lessons, we’ll focus on using node and express for building a backend. We will use Node today to create a simple HTTP server with several endpoints.
Small Group Review: The Request-Response Cycle
With your group, draw a diagram of the request-response cycle as you know it. Include the a client, a server, and how they communicate between each other. After a few minutes, we’ll go over it.
Basics of the Request-Response Cycle
Here is what a sample GET request looks like to a server:
GET / HTTP/1.1
Host: www.google.com
When you request to visit www.google.com, your browser forms a request to Google’s server that asks for the HTML associated with the root-level page (/).
And this is a sample response that Google’s server generates to send back to the browser (client):
HTTP/1.1 200 OK
Content-Type: text/html; charset=UTF-8
Content-Length: 1354

<html>
<body>
  .
  .
  .
</body>
</html>
If we break down the response, we can see that the server is sending back:
- This information is sent using the HTTP version 1.1 protocol
- The
200 OKrefers to the status of the response - in this case it was successful - Following the status is header information. This sample is a very limited number of the headers typically seen in a response, but headers are just more information about the response. Then the body of the response contains the HTML content of the page, which the browser parses and shows in the browser window.
Node.js
So far, we’ve just been building apps that run in the browser. Now it’s time for us to explore building server-side applications with Nodejs. Nodejs is an open-source JavaScript runtime environment built on Chrome’s V8 JavaScript engine. With Nodejs, we have the awesome opportunity to build server-side applications in a language we already know. Despite the fact that it’s all just JavaScript, there are still some pretty significant differences.
Browser v. Node.js
| Browser | Node |
|---|---|
| Build interactive apps for the web | Build server-side apps |
| DOM, Window | No DOM, No Window |
| No control over user’s choice of browser | You control the environment / version of Node |
| ES Modules (import/export) | CommonJS module system (require()/module.exports) |
| Cannot access the filesystem | Can access the filesystem |
| Async | Async |
| Browser-based APIs (fetch, etc.) | No browser based APIs |
Benefits of Node.js
- FAST (async/non-blocking)
- SIMPLE
- JAVASCRIPT
- V8 (open-source/always being updated)
- NPM (huge number of libraries)
Modules
Simply put, modules are just pieces of encapsulated code. While working in Nodejs, we will encounter 3 different kinds of modules: internal modules that ship with Node, modules that we as developers create, and remote modules that we can download and use from the internet.
Internal Modules
Node has an intentionally small standard library. The standard library is documented in the Node API Documentation.
The standard library modules can be required from any Node program. You do not have to give a relative path of where the module lives on your local machine - all you need to do is require the module using the CommonJS require syntax.
const http = require('http')
const fs = require('fs')
const url = require('url')
const path = require('path')
Your Code
All Nodejs code that we as developers write and export are modules. As the author, you decide how and what to expose from your modules to other modules. We do this with the module global object provided to us by Nodejs.
//code.js

const me = 'Christie'

const greeting = (name) => {
	return `Hi ${name}!`
}

//if I just want to export 1 thing from this file
module.exports = me

//if I want to export more than one thing from this file
module.exports = { me, greeting }
When we want to use these modules in another file, we have to import them. Nodejs provides us with another global, require, to accomplish this. This function takes a relative path to the module that you want to consume, and synchronously load it by returning whatever the target module exported.
//index.js

//if I have a single export from a file
const me = require('./code')

//if I have multiple exports from the same file
const { me, greeting } = require('./code')
Remote Modules
By now, we are all very familiar with NPM. NPM ships with Node and is the CLI most developers use to manage remote modules. Once we have installed a remote module, we can access it the same way we access Node’s internal modules.
const fetch = require('node-fetch')
How is code evaluated in Node.js?
- Interactive REPL
- This is our playground in the terminal
- Great for trying things out (similar to the console in the browser)
- Just type
nodewith no arguments and begin - Try it out!!!
- CLI Executable
- This is what we use to execute our code
- Just type
node path/to/your/file.js
Exercise
- Create a directory that we can do some practice in
- In that directory, create a file and write a function - it can do anything you want
- Now export that module
- Create another file that will require your first module and use that code in some way
- Use the Node CLI executable to run your code
Practice: Handling Requests in Node.js
We’re going to set up a simple Node server for handling a dataset of messages. Each message object contains a user and a message property. You might have worked with the Express framework on the server-side, which has a lot of very helpful functions for getting a server up and running. Today, we will just be using the Node HTTP library to remind ourselves that life is sometimes harder without frameworks - it will also give us an idea of the low-level programming that a server needs to handle requests.
Create and cd into a new directory:
mkdir messages && cd messages
Auto-generate a package.json file (with default “yes” to each of the standard questions) using:
npm init --yes
Create a Simple HTTP Server
Create a new file called server.js and add the following code.
const http = require('http')

const port = 3000

const server = http.createServer()

server.on('request', (request, response) => {
  response.statusCode = 200
  response.setHeader('Content-Type', 'text/plain')
  response.write('Hello World\n')
  response.end()
})

server.listen(port, () => {
  console.log(`The HTTP server is running on port ${port}.`)
})
Let’s talk about what’s going on here. This code first includes the Node.js http module. The createServer() method of http returns a new instance of HTTP server. At the bottom of the file, the server is set to listen on the port we have specified. When the server is ready, the callback function is called and informs us that the server is running.
Before we run the server and see it in action, take a few minutes to read through the documentation to learn more about each of the response functions we’re using. Can you describe in one or two sentences what each of these methods is doing?
Run Your Server
First, let’s install a super helpful tool. Nodemon is an npm package that will auto-reload your server any time you make changes so you can see them take effect immediately. Without nodemon, you would have to restart your server every time you made a change to your code. Install nodemon globally with:
npm i -g nodemon
To start up our server, run nodemon server.js in your terminal. You should be alerted that The HTTP server is running on port 3000. Now, using Postman, make a GET request to http://localhost:3000 and see what happens. You should see a ‘Hello World’ response returned.
When the server receives a request from a client, a “request” event is emitted, and the server responds with a simple HTTP response.
The Inner Workings of the Request and Response
The request object is an instance of IncomingMessage and allows us to access all sorts of information about the request, like the response status, headers and data.
The response object is an instance of ServerResponse and provides numerous methods for sending data back to the client.
Headers
The headers of a request or response allow the client and the server to pass additional information about the request/response to each other. Think of headers as metadata that allow a client or server to handle the request/response properly.
Headers are information as simple as a hash of key-value pairs: { "Content-Type": "text-html" }
There is a lot of header metadata that you can pass in a request. A common header is Accept, which allows you to set what media types are acceptable. Example Accept header in a request would be:
 Accept: application/json

 This should be interpreted as "When you send me a response, I prefer the response to be formatted using JSON."
Another common header is “Content-Length”. This indicates the length of the body, and it’s measured in bytes - a good way to know quickly how big a request is.
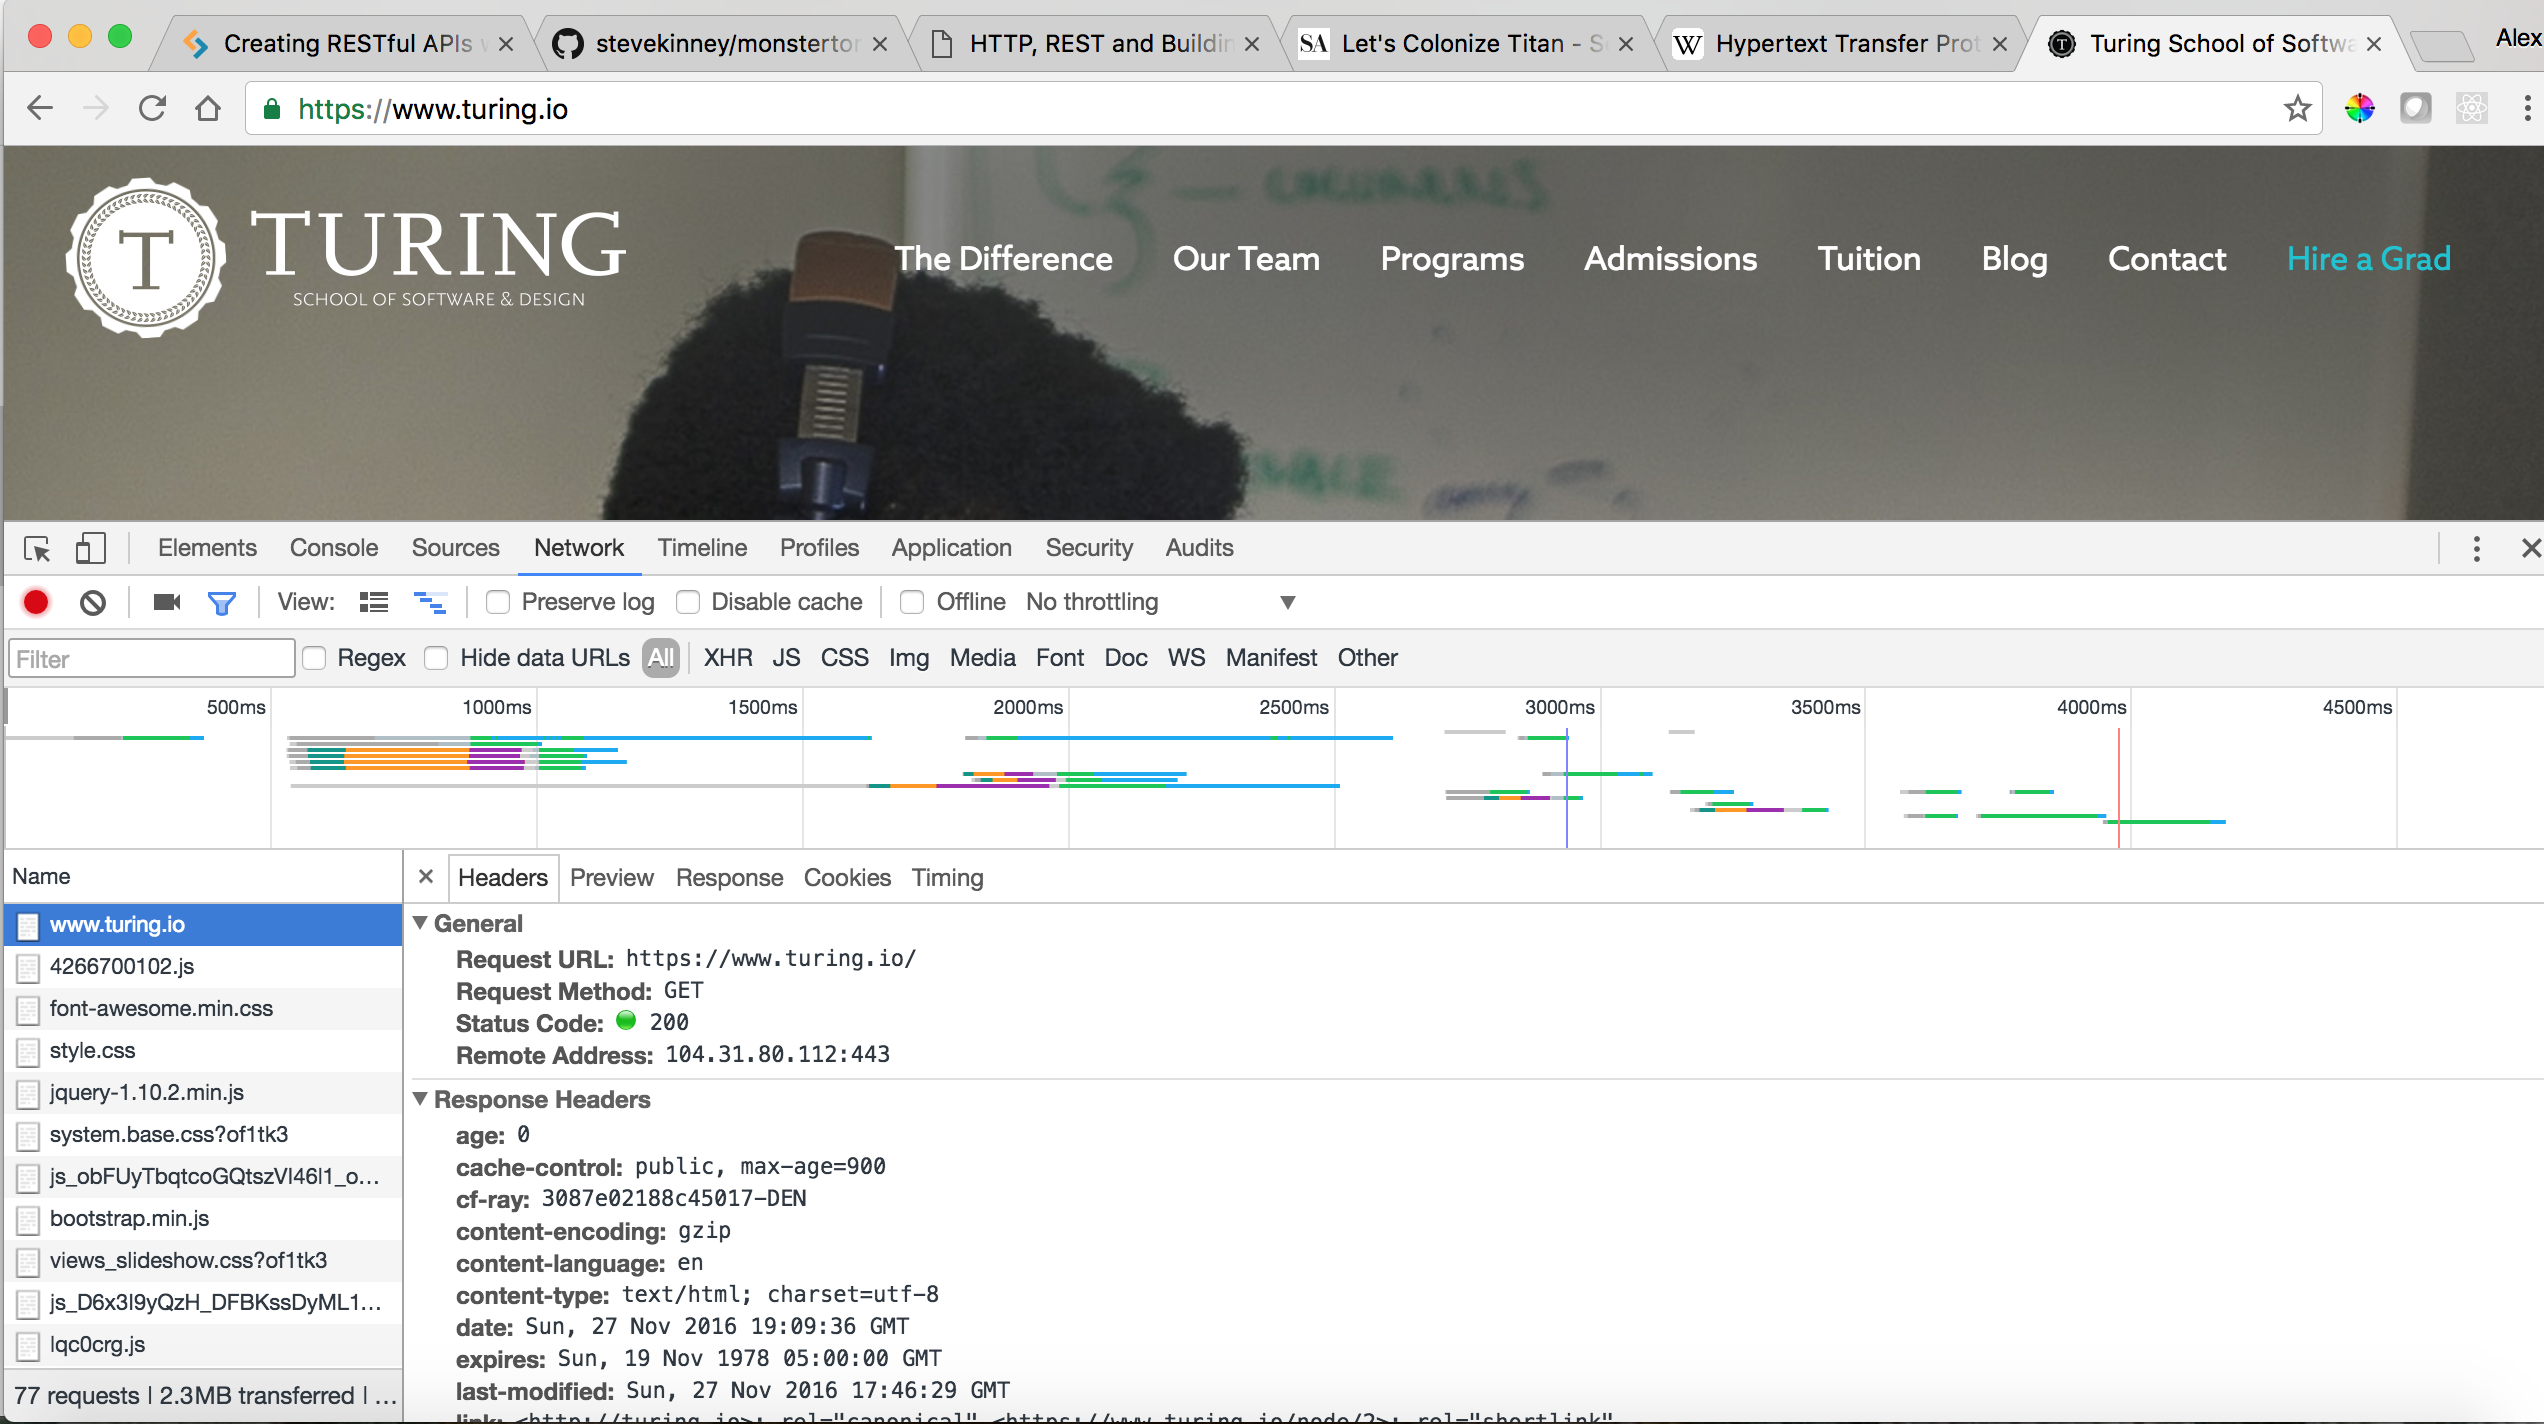
If we look at a response in our browser, we can check out the headers:

There is a lot of information in the headers, but one of the most important parts is the status code that is returned to the client. This tells us what happened to our request. Check out https://www.w3.org to see all of the status codes for HTTP 1.1, but the general rules are:
- 200 range means everything is OK, the request was successful
- 300 range means you are probably being redirected
- 400 range means you sent a bad request. Do it again, but better
- 500 range means that something is screwed up with the server (thanks backend…) but my request is OK
Body
Requests and responses also might have a body. For example, when you make a PATCH request to update a resource, your fetch call might look like this:
fetch('/api/v1/books', {
  method: 'PATCH',
  body: JSON.stringify({
    title: 'Oh, the Places Youll Go!',
    author: 'Dr. Seuss'
  })
})
This is an example of sending a body with your request so that the server can parse the data in it and update a resource based on the resulting body object. When the resource is successfully updated, the server will send a response with a status code of 200, and usually a body object that contains the entire resource, reflecting the new changes that were just made:
// response body

{
  'title': 'Oh, the Places Youll Go!',
  'author': 'Dr. Seuss',
  'isbn': '13 9780679805274',
  'published': '1990'
}
Practice: Handling Multiple Requests in Node.js
Right now, our server responds with Hello World no matter what request we make. Let’s make our server a bit more useful. First, we’ll want to set up some initial messages in our server file to interact with:
const messages = [
  { 'id': 1, 'user': 'christie lynam', 'message': 'react and redux are cool!' },
  { 'id': 2, 'user': 'david whitaker', 'message': 'servers are cool!' },
  { 'id': 3, 'user': 'jeff casimir', 'message': 'jobs are cool!' }
]
And we’ll edit our request handler to handle the RESTful HTTP methods: GET and POST.
server.on('request', (request, response) => {
  if (request.method === 'GET') {
    getAllMessages(response)
  }

  else if (request.method === 'POST') {
    let newMessage

    request.on('data', (data) => {
      newMessage = {
        id: new Date(),
        ...JSON.parse(data)
      }
    })

    request.on('end', () => {
      addMessage(newMessage, response);
    })
  }
})
We can see now that the request object contains information about the request made by the client. We can access the request method using request.method.
On Your Own
Given the new functions we’re calling (getAllMessages and addMessage), create these functions and have them send an appropriate response back to the client.
The response for a GET request to localhost:3000/ should be:
[
  { 'id': 1, 'user': 'christie lynam', 'message': 'react and redux are cool!' },
  { 'id': 2, 'user': 'david whitaker', 'message': 'servers are cool!' },
  { 'id': 3, 'user': 'jeff casimir', 'message': 'jobs are cool!' }
]
For the POST request, an example request would be:
POST to localhost:3000/
And the response for this POST request should be something like:
{ 'id': 4, 'user': 'cardi b', 'message': 'i'm livin' my best life!' } // with a response status code of 201
Check For Understanding - Research on Your Own
- What type of information is included in the header of a request?
- What are the major RESTful methods and what do each of them do?
- What is Node?