TravisCI Walkthrough
Goals
- Following this lesson, here is what we did to set up TravisCI.
Getting Started with TravisCI
-
Sign up for a TravisCI account here and login with your GitHub account (the
.orgversion of TravisCI is FREE, the.comversion of TravisCI is NOT free). -
Authorize TravisCI to access information about your GitHub repos (it’s ok)
-
Start to your repository using the
+button next to “My Repositories” on the left pane -
Search for the name of the repository using the
Filter repositoriesbox (you might have to click theSync accountbutton on the top right). For this walkthrough, I’m using a GitHub repository calledtravis-test.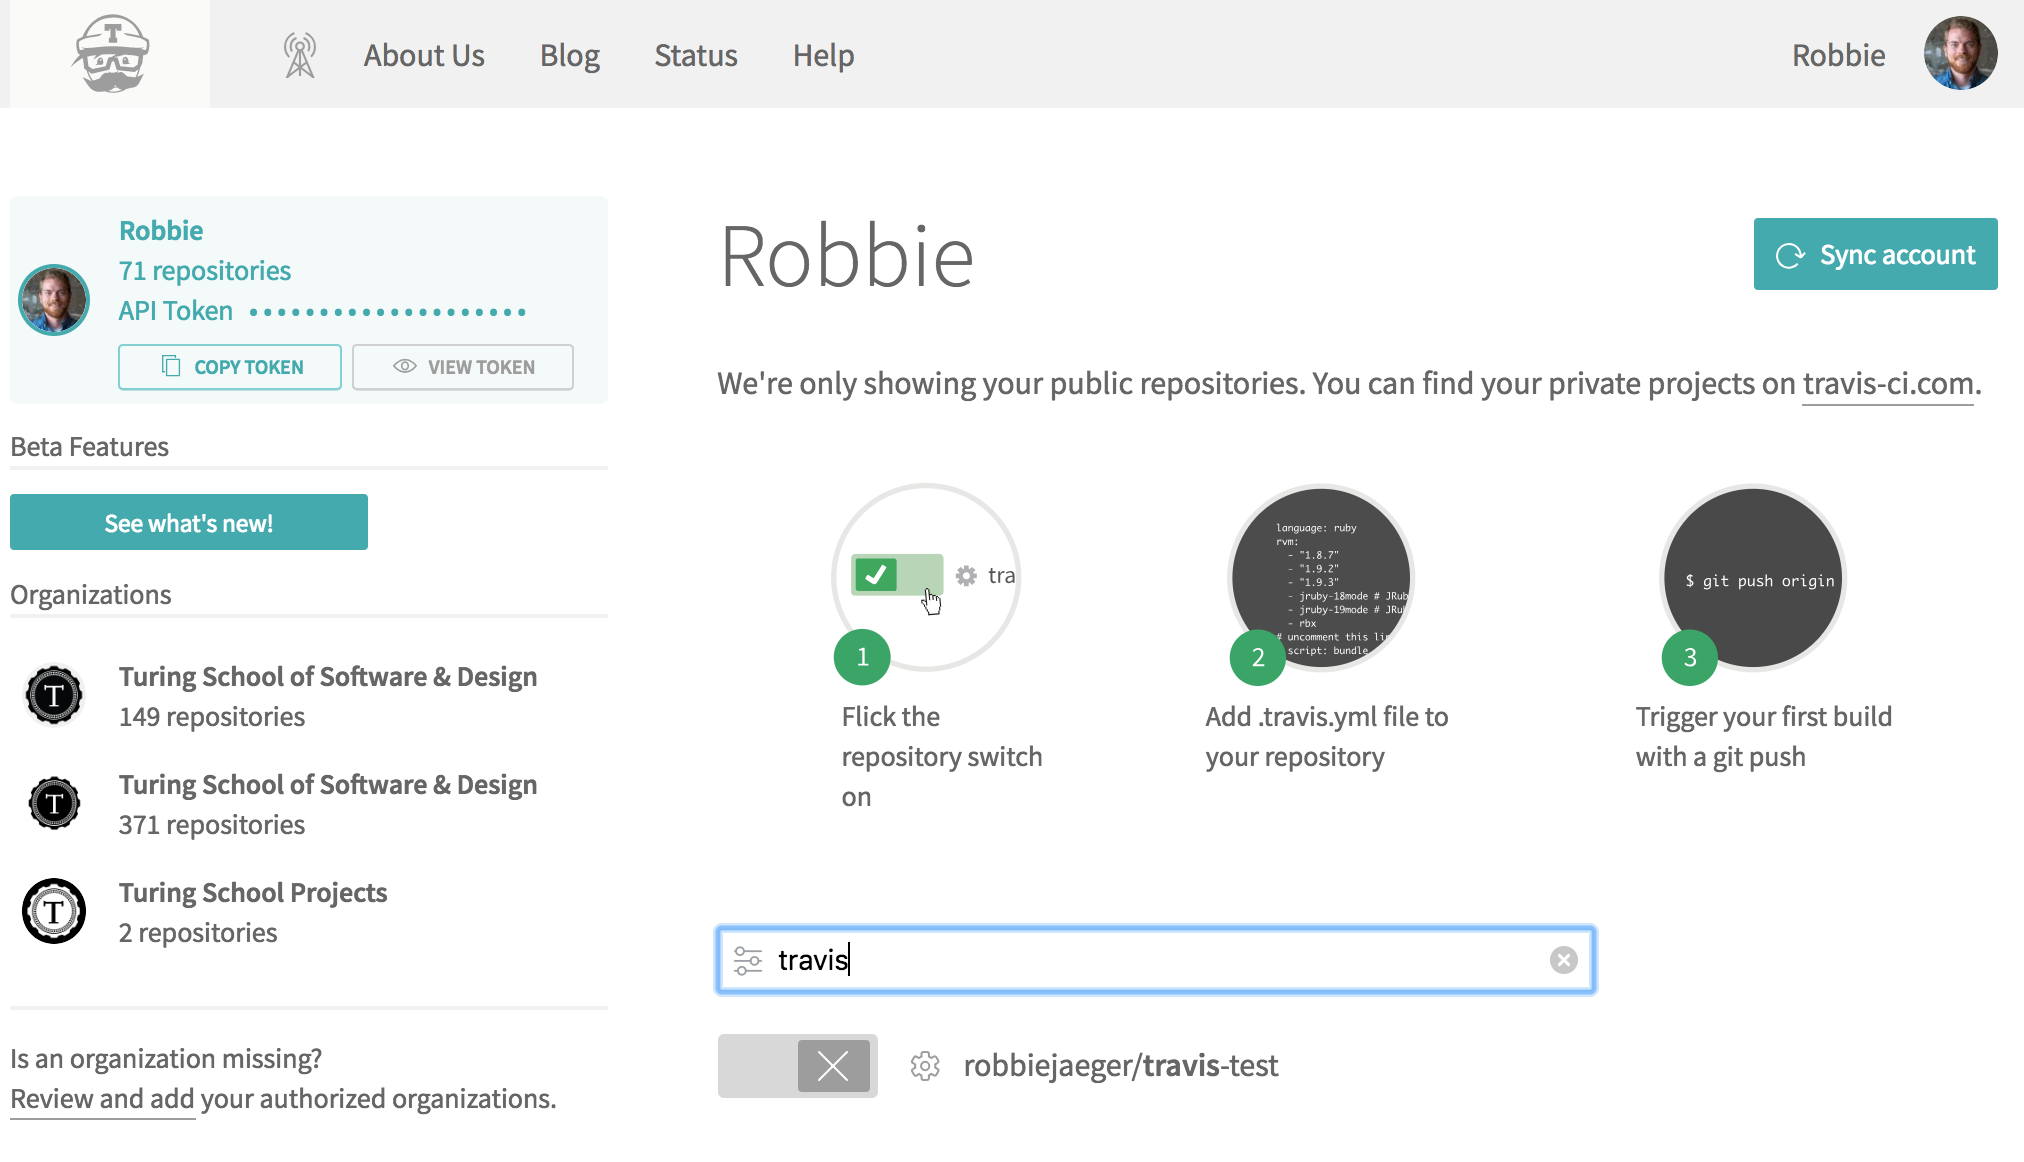
-
Flip the switch!

-
Go back to your TravisCI dashboard (Click on the
Travis CIicon on the top left of the page)
That’s it! Easy, right? Just kidding.
Now, any time you push new commits to your remote repository, TravisCI will automatically kick off a new build so you can keep an eye on the overall health and stability of your application.
Configuring TravisCI
As you may have noticed, front-end repos are made up of 90% config files and 10% actual code. In order for TravisCI to be able to run our code and run our tests, we need to add a .travis.yml file to the root of our repository. Any time TravisCI runs a build, it will look for this file and follow any instructions we provide.
What is a Build?
Think of all the steps you have to take if you want to collaborate on a classmate’s project. You have to fork their repo, clone it down locally, make sure you have an up-to-date version of Node (or some other platform) on your machine, install any dependencies, start up a server and maybe run a file watcher. Sometimes more complex projects require additional steps. This setup process is called a “build”. It’s all the things you need to do to get your app up and running. CI tools will run through all of these steps (and then some!) to make sure the application is in a stable, working state before it goes to production.
Add a .travis.yml file to the root of your project. Yes, there is a dot in front of the filename because it is a hidden file, which are typically used for configuration files.
Phases of the Build Process
The yml file can define settings for various phases of the build lifecycle. In TravisCI, there are two main phases of the build lifecycle, three if you add on automatic deployment:
- install: install any dependencies required (configure the virtual machine (VM) to be able to run your code)
- script: run the build script (run your code and tests)
- deploy: deploy your code to your web servers
Test
Before we get started configuring the TravisCI installation, script, and deployment phases, let’s make sure we have our test script set up.
By default, in our Node projects the TravisCI test section will simply try to run npm test. If you don’t currently have a command in here for your test script in your package.json file, update it to reflect the command you’ve been using to run your tests. That might look something like this:
"scripts": {
  "start": "node server.js",
  "test": "NODE_ENV=test mocha --exit"
}
Run npm test to make sure your tests are passing locally. If they are, you’re ready to move on to the next steps. If not, then fix or skip the tests temporarily to get a passing test suite.
Begin TravisCI Configuration
Push Up Travis Config File
You take it from here. Let’s push up our .travis.yml file to the master branch on GitHub, look at the TravisCI build, and squash those errors!
If we look at our repository on TravisCI, we see that it starts a new build automatically! The build starts, but it soon fails…
Let’s take a look at what the build output is saying:
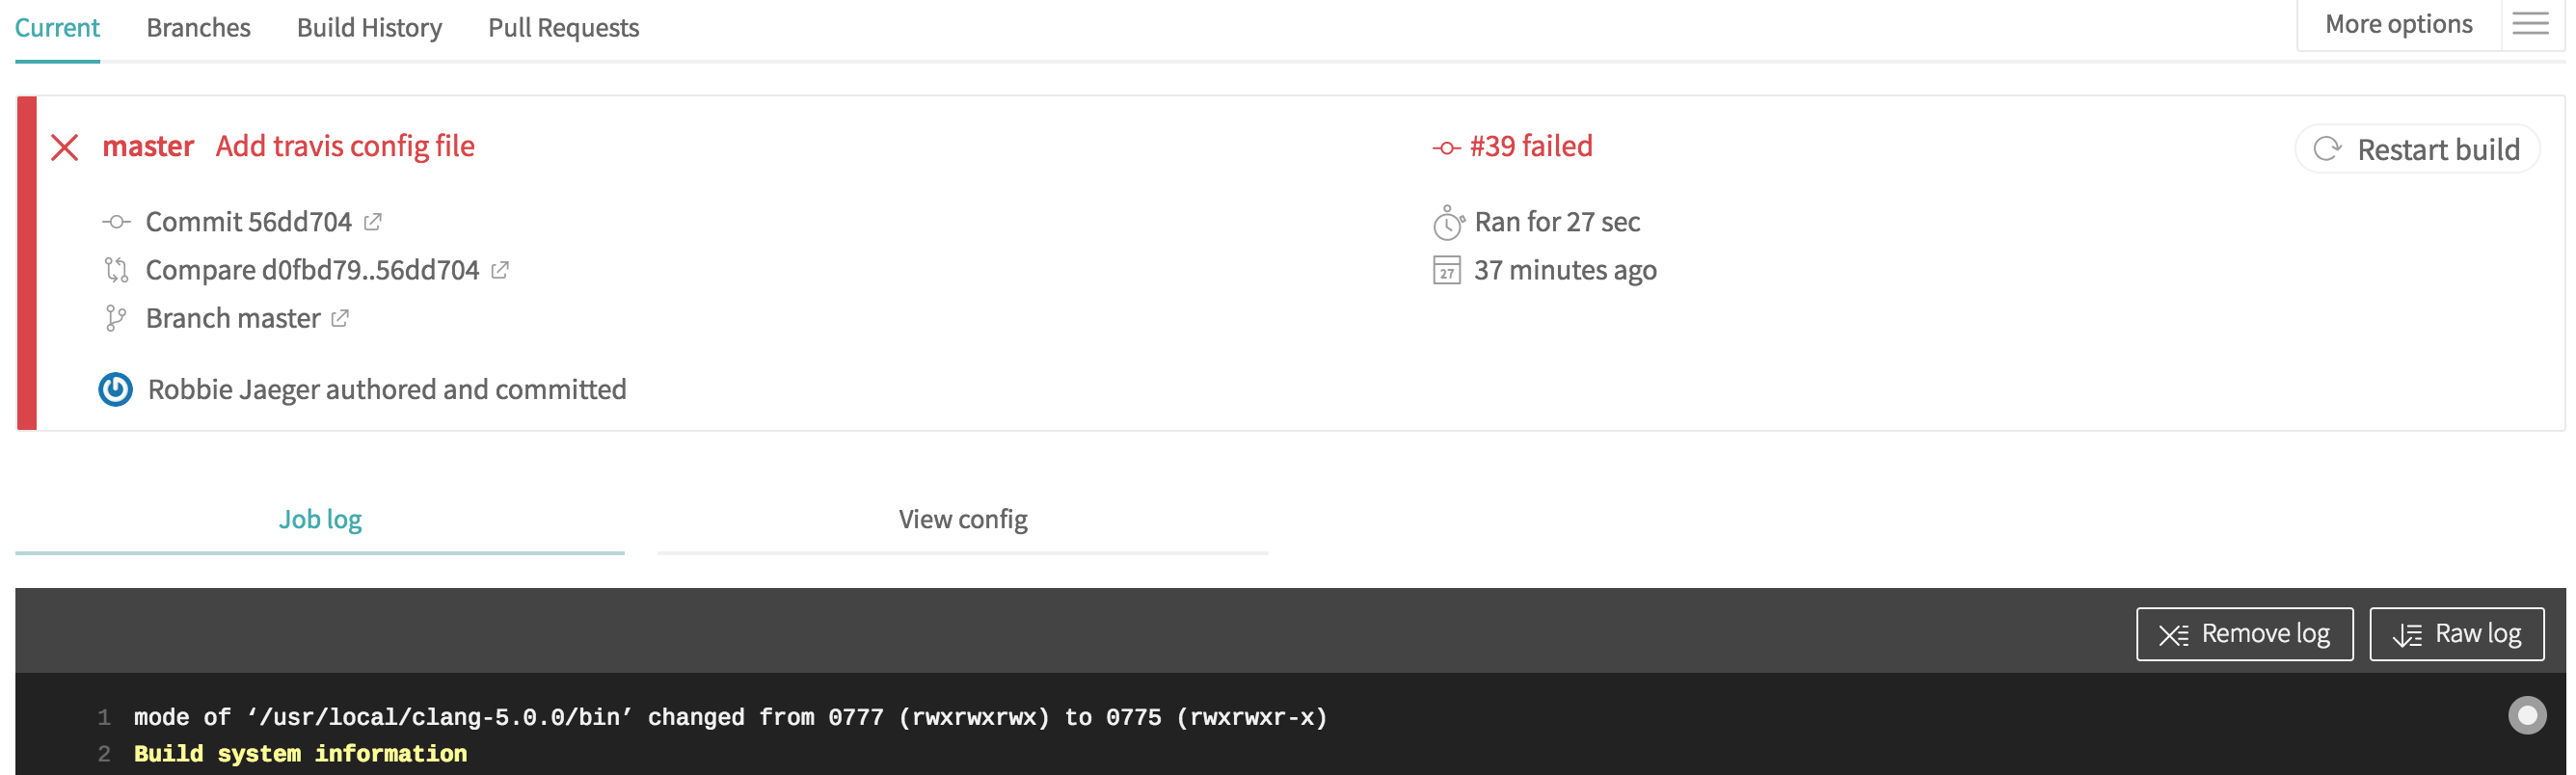
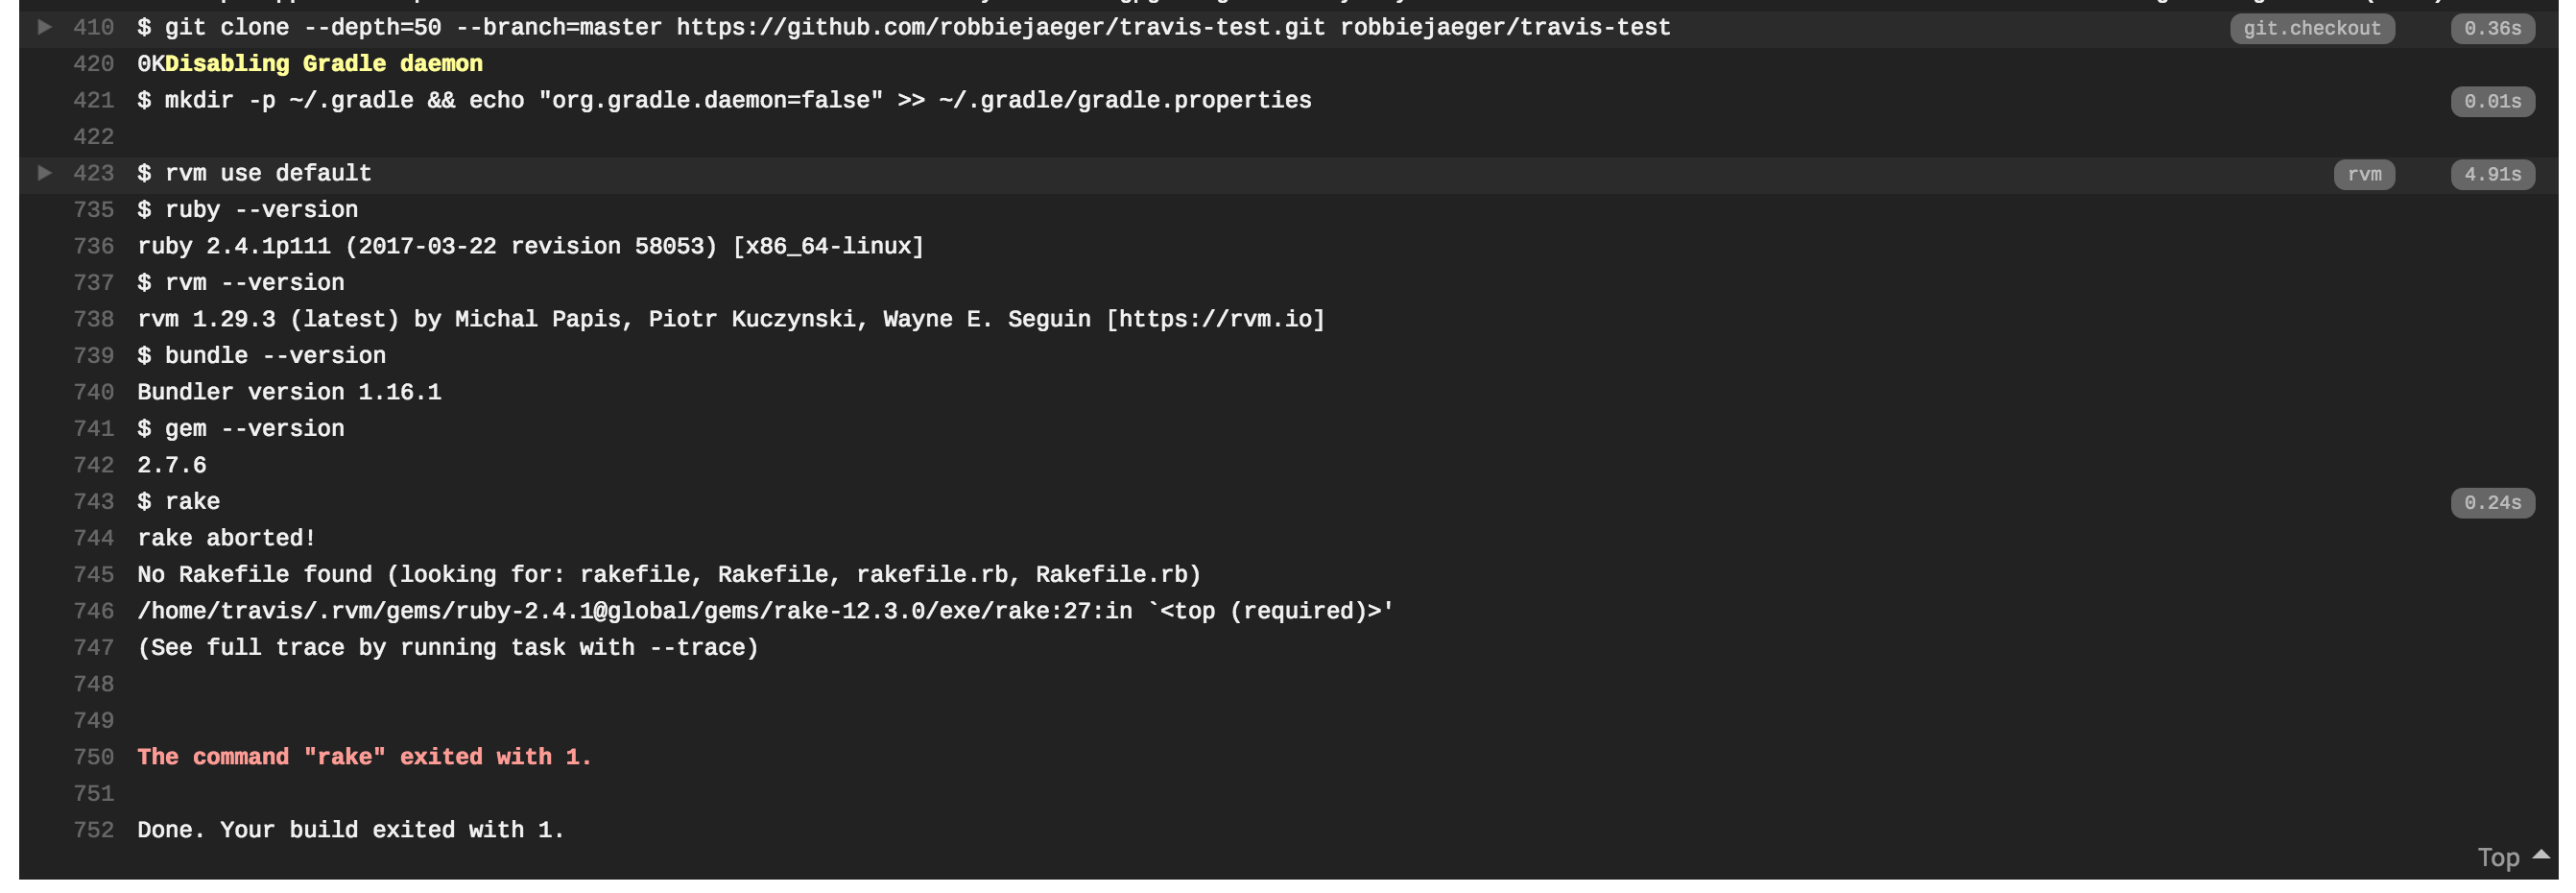
It looks like it is trying to build a Ruby project! We have a Node project, so that’s clearly causing the build failure.
Specify Node Build
We can look at this documentation page to see how to set the build as a Node build instead.
In the .travis.yml file, add the node configuration:
language: node_js
node_js:
  - "node"
If you need to use a specific version of Node, instead of - "node", you could specify a version like - "7" for version 7 of Node.
Commit and push up the changes to GitHub to trigger another build on TravisCI. What is our new error?
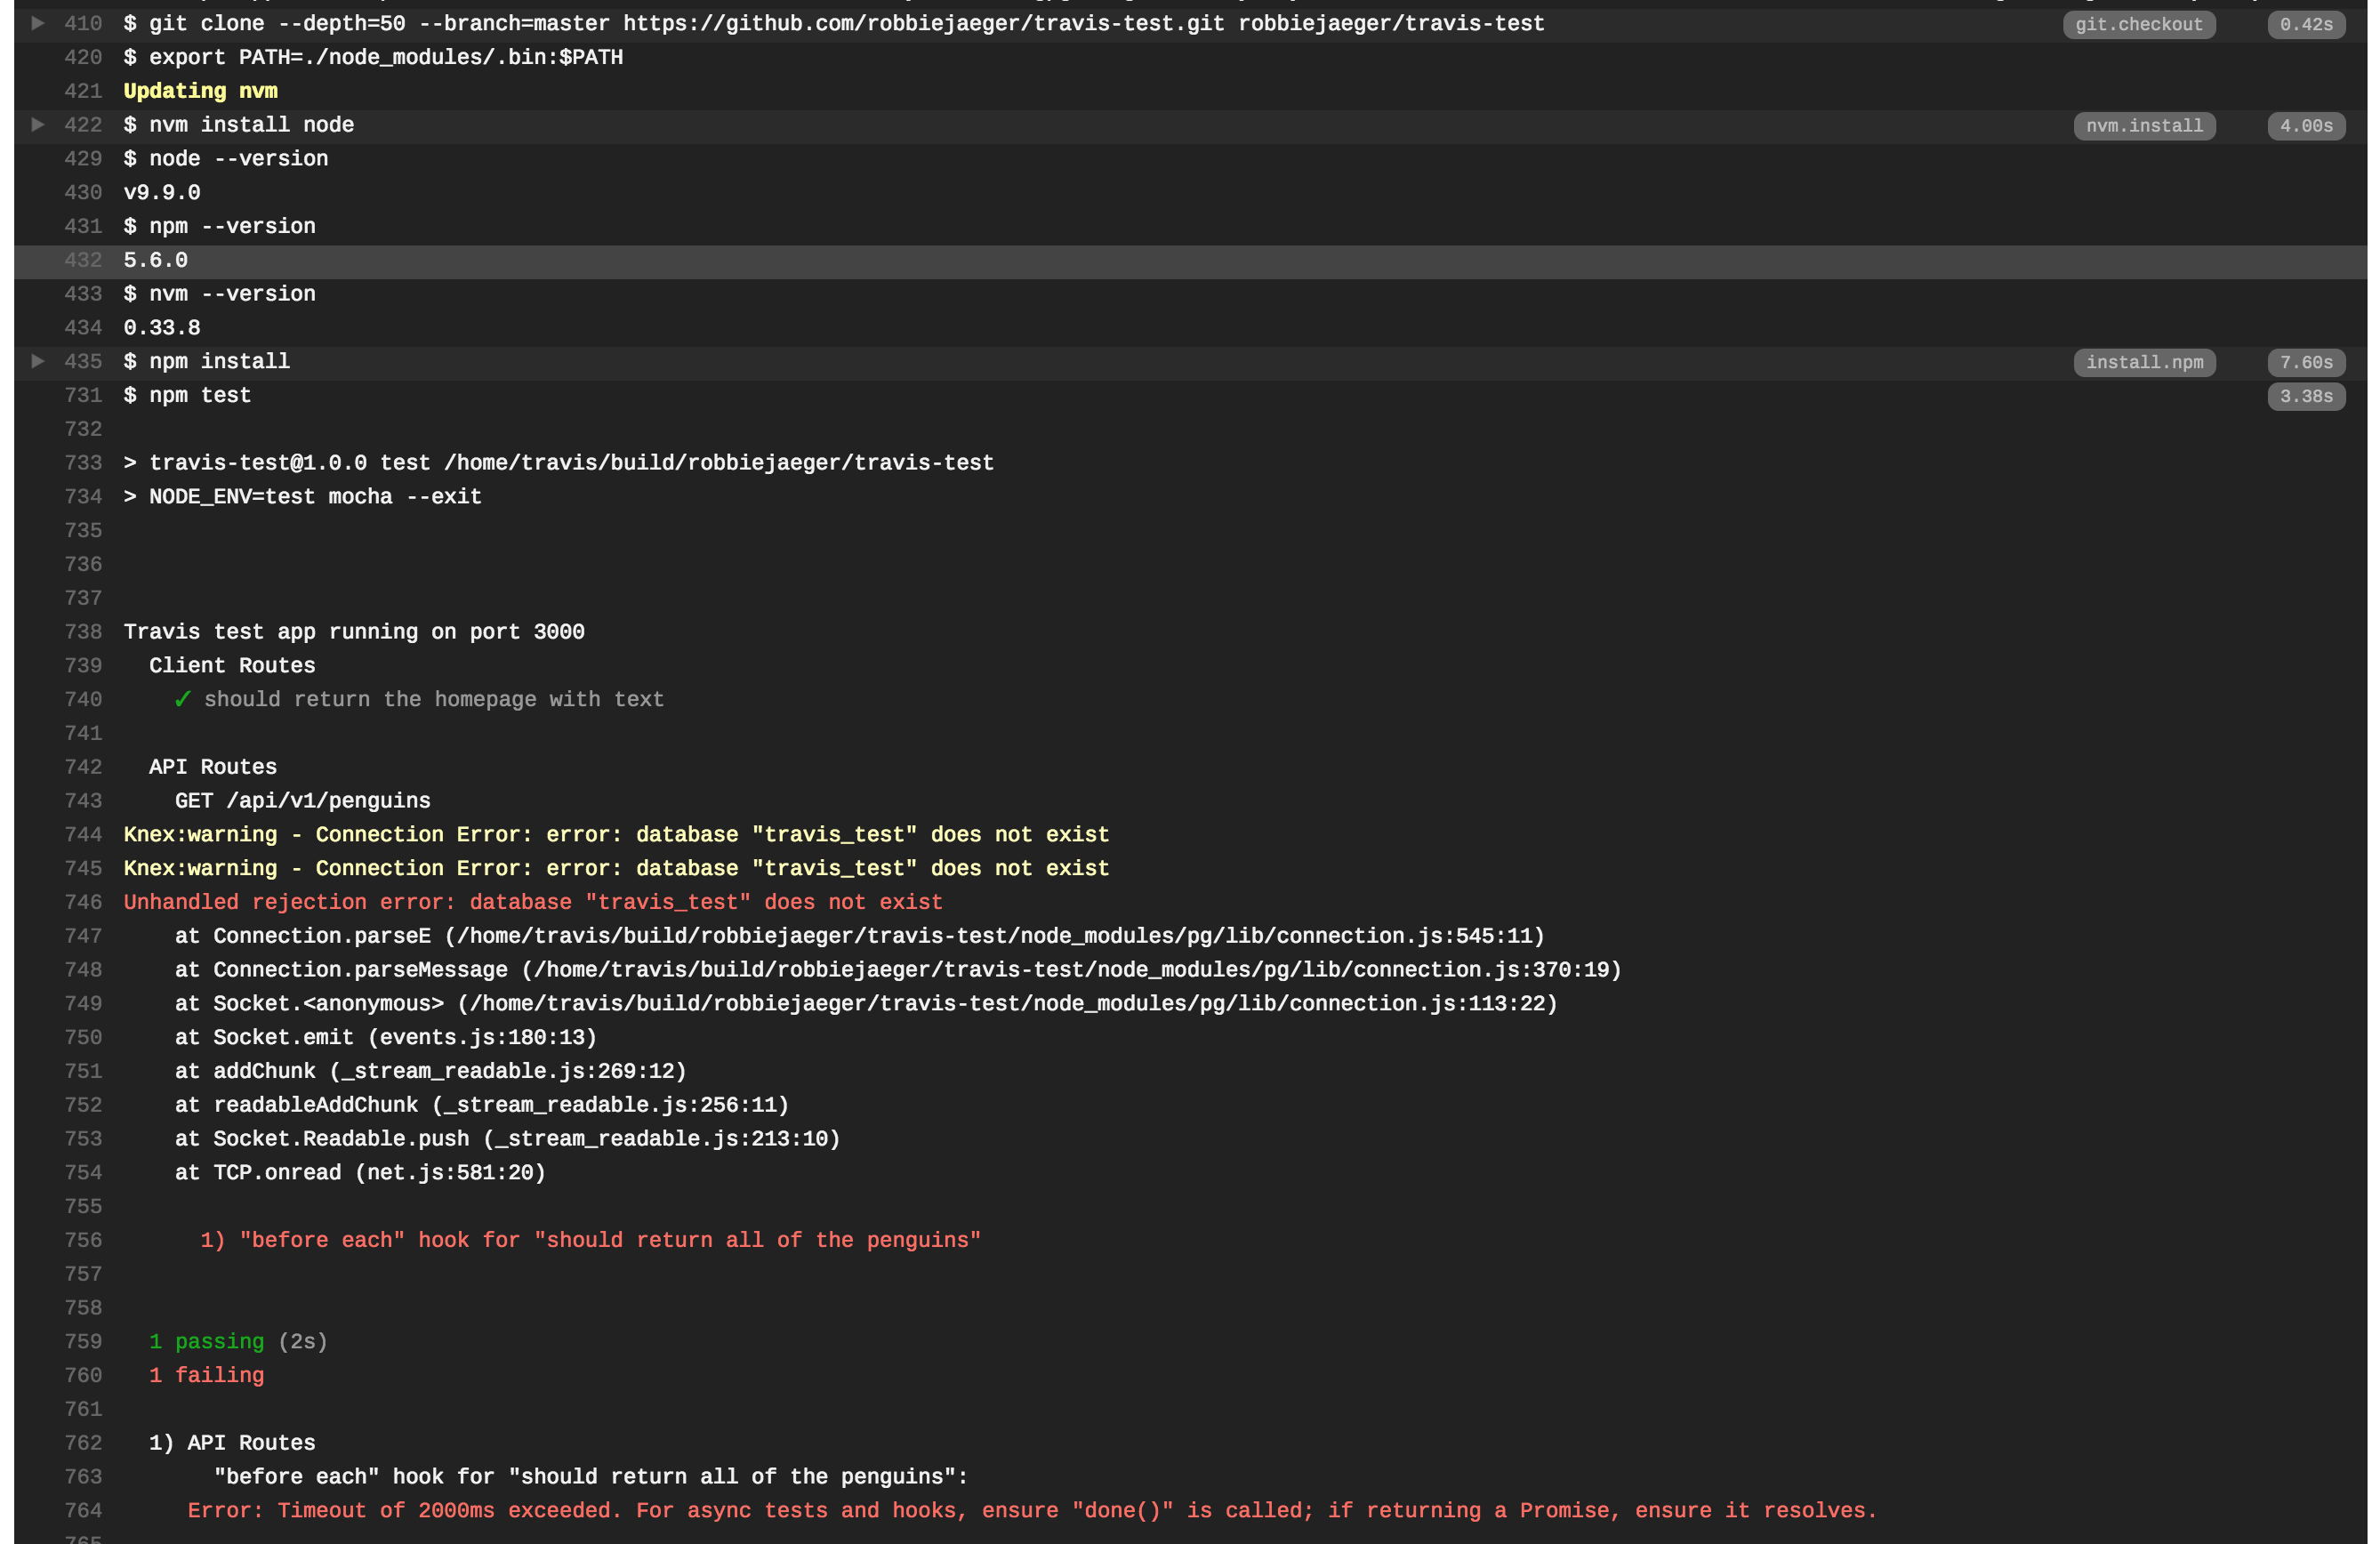
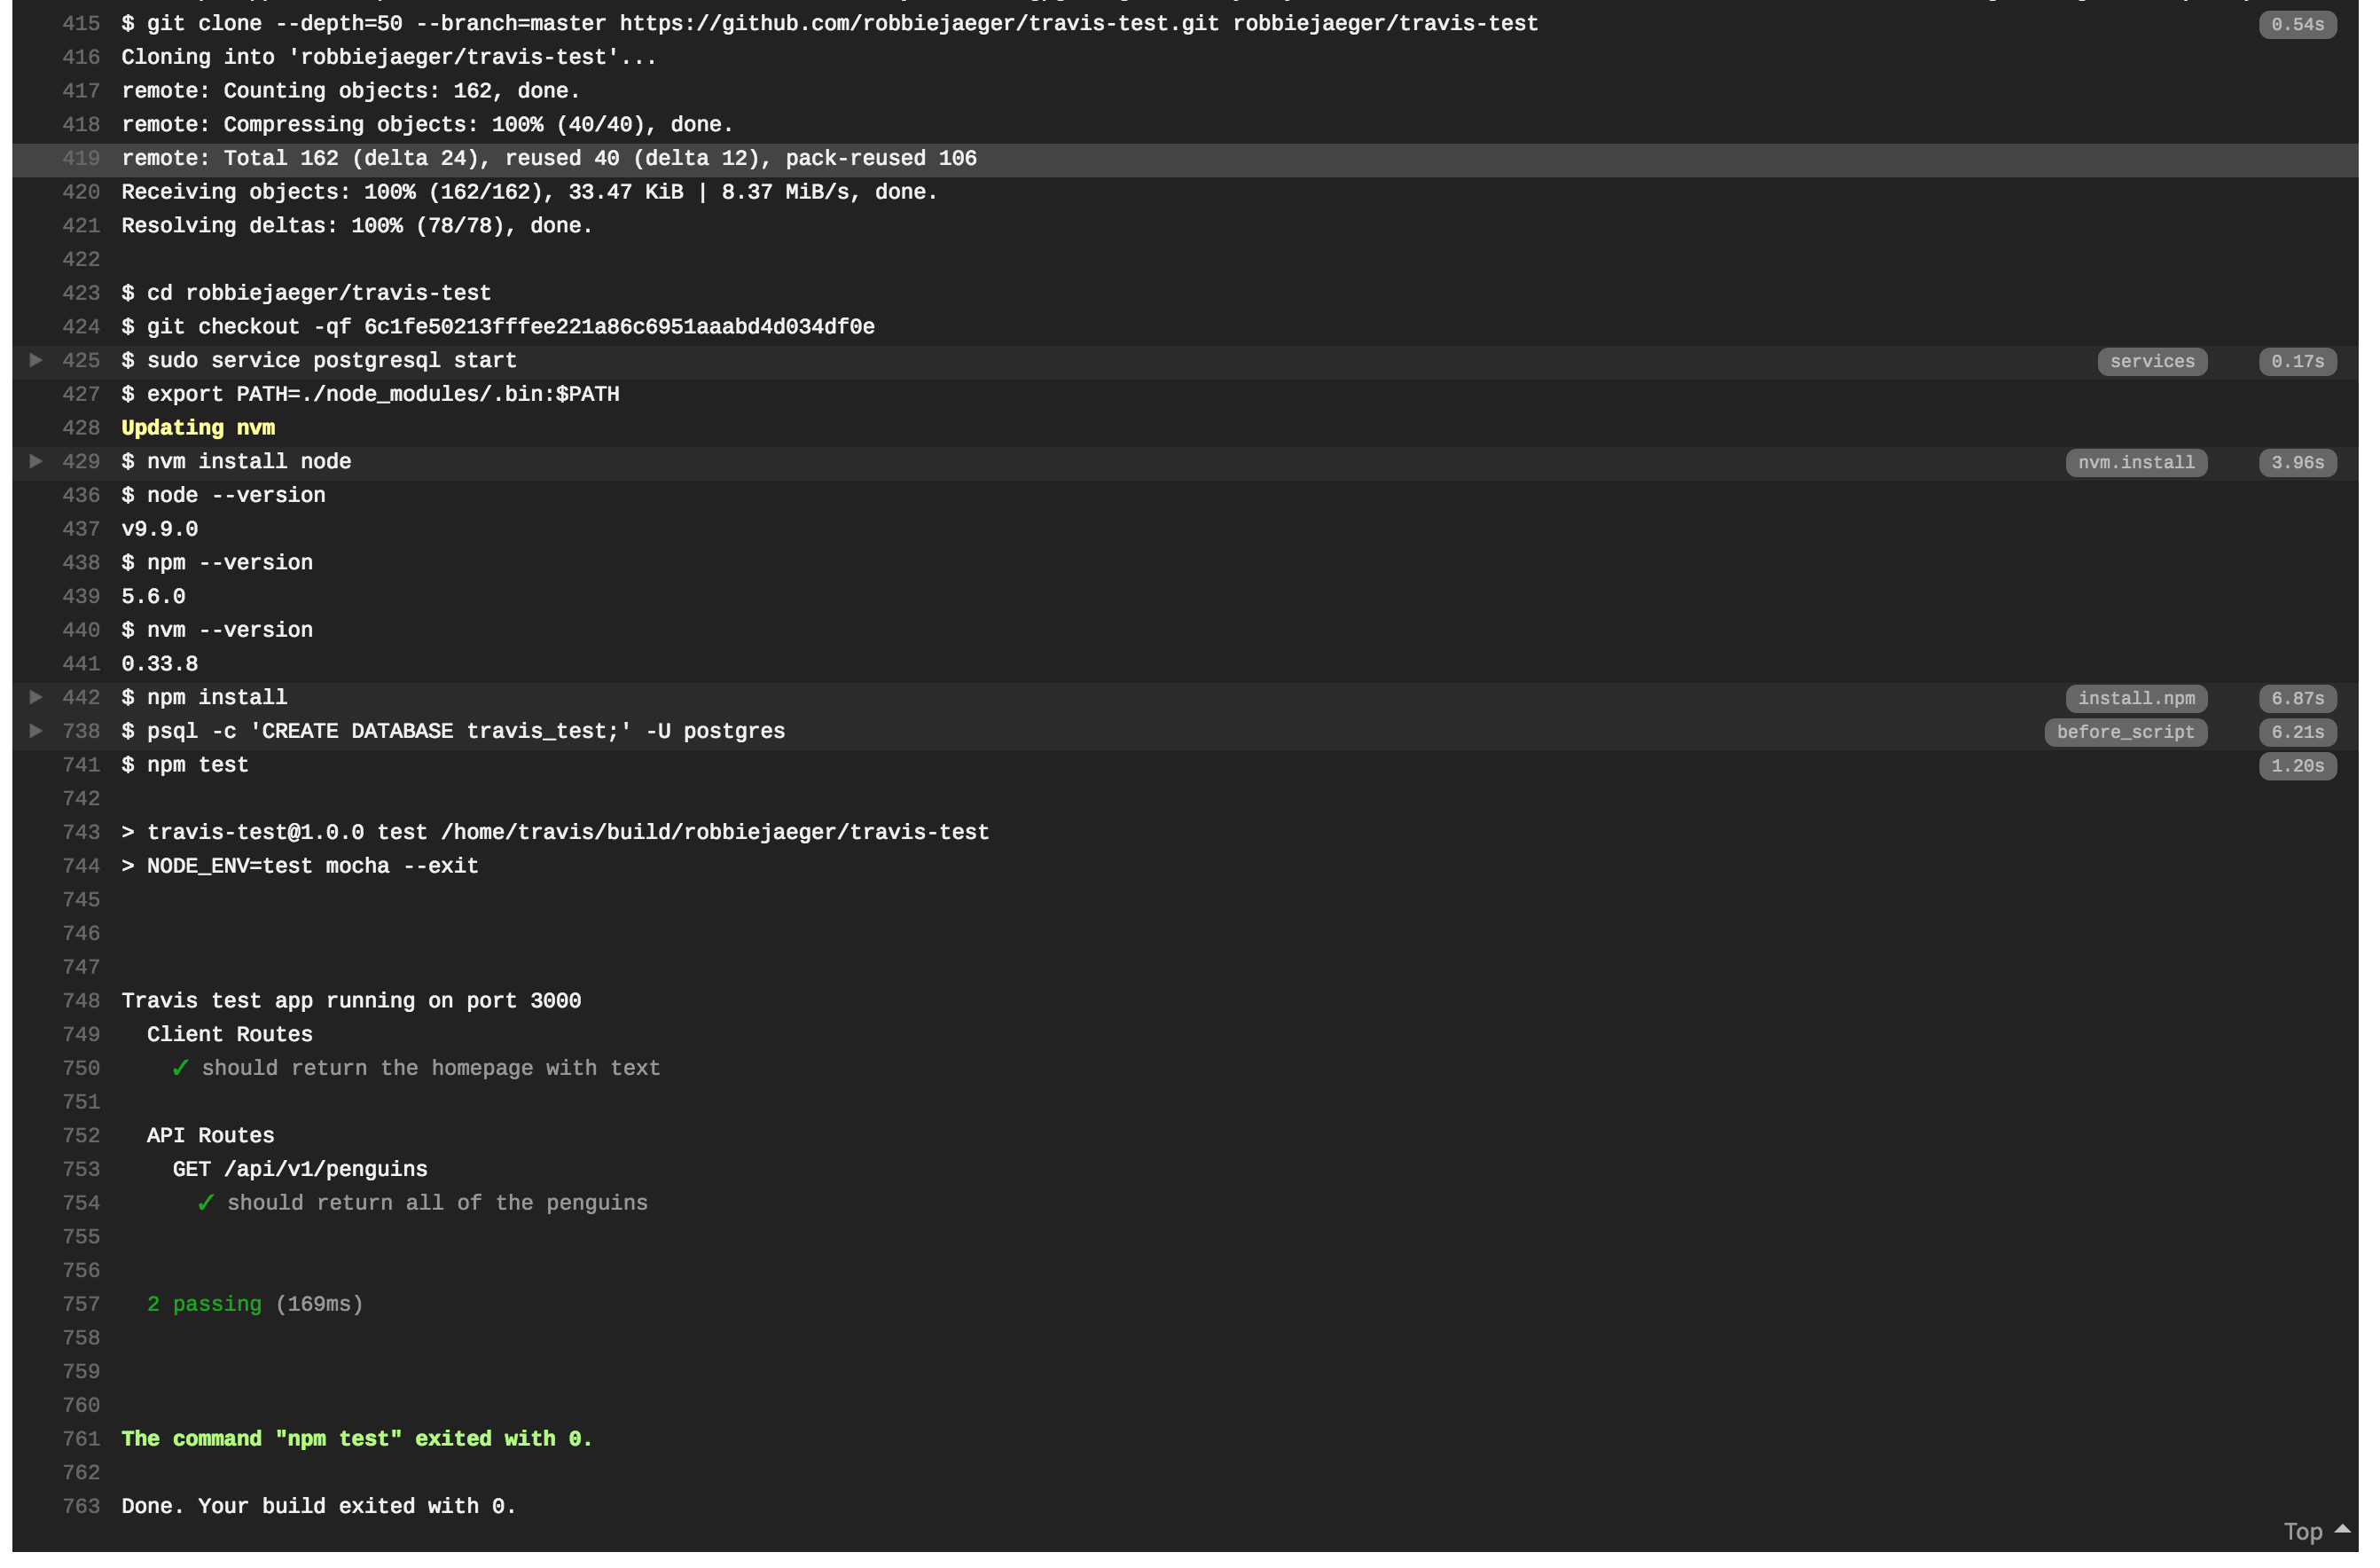
We now have a Node project building. Notice that TravisCI cloned down our repository, ran npm install to install our dependencies, and then ran npm test to run our test suite. The test failed - therefore the build failed.
The failure says Unhandled rejection error: database "travis_test" does not exist. So we have to create the database, right?
Create the Database
When we run our test suite, we use the test environment (which points to the knexfile.js config file and uses the test configuration). So we need to add a postgresql database with our test databases name. In this example, the test database is named travis-test. Your database name will probably be different.
Using this documentation page, we can see how to add a postgresql database and the command to build a test database.
Now our .travis.yml config file should look like:
language: node_js
node_js:
  - "node"
services:
  - postgresql
before_script:
  - psql -c 'CREATE DATABASE travis_test;' -U postgres
Notice the command to create the database travis-test. Any commands listed in the before_script: section run before TravisCI runs npm test. Again, your database name will differ, so you need to change the name in the script.
Let’s commit this change, push up to GitHub, and trigger a new build.
SUCCESS!! We have a passing build!
Dismiss Email Notifications
You might have noticed that TravisCI emails you every time a build takes place. This can get annoying, but this documentation page tells you how to dismiss the emails. Here is what we need to add to our .travis.yml file:
language: node_js
node_js:
  - "node"
services:
  - postgresql
before_script:
  - psql -c 'CREATE DATABASE travis_test;' -U postgres
notifications:
  email: false
Configure Automatic Deployments to Heroku
If a build passes on TravisCI, then that means the code is good enough to go to production. We can make TravisCI automatically deploy to Heroku for us after a build passes.
This documentation page goes over the configuration needed to add automatic Heroku deployments to your TrvisCI build.
We need the TravisCI command line tool to generate a Heroku API key. You can install the tool using the command:
gem install travis -v 1.8.10 --no-document
If your terminal gives you a response along the lines of permissions needed, then you might need to use the sudo command to install the gem. In that case, use the command sudo gem install travis -v 1.8.10 --no-document where you’ll have to enter your system password.
Next we need to generate the deployment API key. To do so, use the command:
travis encrypt $(heroku auth:token) --add deploy.api_key --org
Once you run this command (there might not be any feedback in the terminal that it was successful), look back in the .travis.yml file. You should see a new section added called deploy with the api_key and secure added as children to the deploy section.
Note: You cannot copy the api_key from this walkthrough. It is unique to your application and Heroku account. You must generate your own API key using the command above.
We also need to add information about where we are deploying, specifically the provider and Heroku app name.
So our .travis.yml file will look like:
language: node_js
node_js:
- node
services:
- postgresql
before_script:
- psql -c 'CREATE DATABASE travis_test;' -U postgres
notifications:
  email: false
deploy:
  provider: heroku
  api_key:
    secure: POZEVZ7mNwqAo1Ts6XjUVoQsQFdVPYus2d0VaYI1K...itGoesOnForAWhile
  app: travis-test-penguins
  skip_cleanup: true
The app name is the name of your Heroku app. For instance, this app’s Heroku address is https://travis-test-penguins.herokuapp.com/. So the app name is travis-test-penguins.
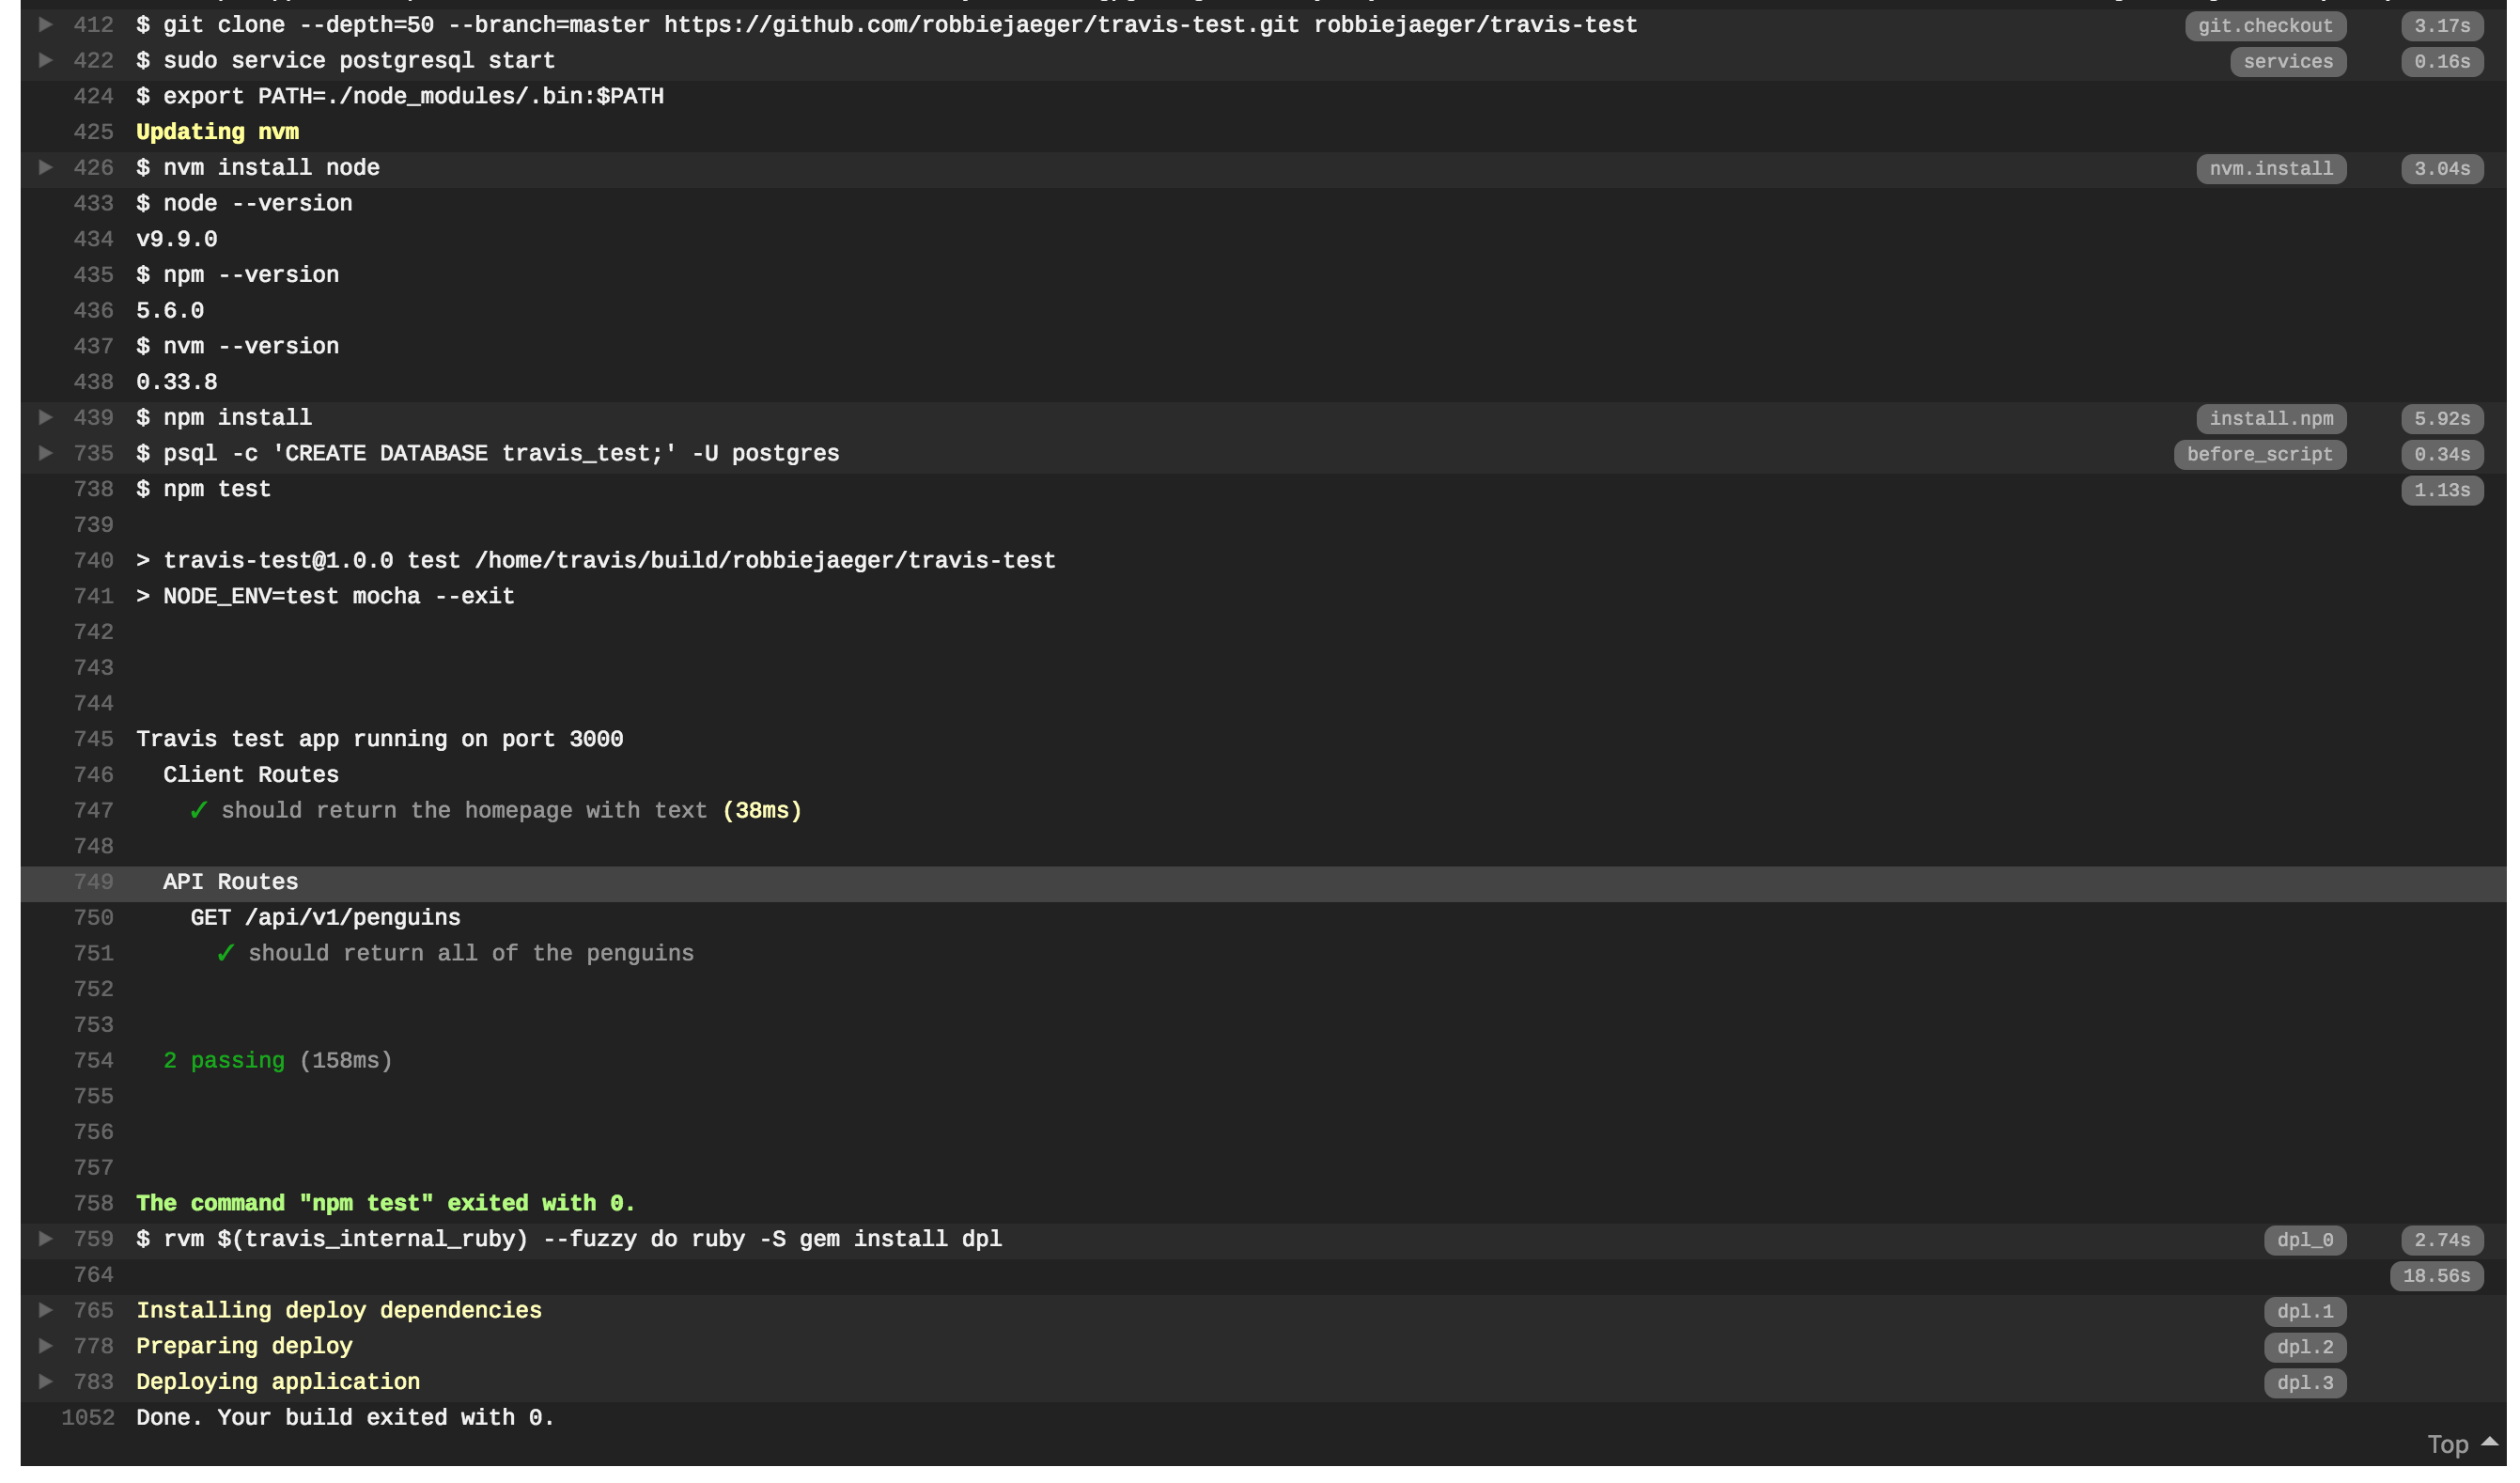
Commit and push up the new changes. Watch the new build, and we have automatically deployed to Heroku!
Checking Pull Requests
After we have configured pushes to our master branch to successfully build, what about checking pull requests before they are merged?
Badges
What about those cool badges you see in GitHub repositories that show if the latest build has passed all of the tests in TravisCI? How do we add this?
This documentation page will give you an idea of how to add the badge to your GitHub repository.