Localization / Internationalization
Goals
By the end of this lesson, you will:
- know the difference between localization and internationalization
- be able to accurately detect a user’s locale and serve up an appropriate translation
- understand the strategies and patterns that make an app easily localizable
What is Localization/Internationalization?
Localization is the process of adapting an existing website to local language and culture. Internationalization describes the patterns, strategies and conventions an application should use in order to facilitate easier localization in the future. While not every app you build will need to be localized, it’s important to keep internationalization strategies in mind when building an app that may need to reach wider audiences in the future.
Many people mistakenly believe localization simply refers to rendering the page text in multiple languages. In reality, it’s a bit more involved than that. There are many technical and design decisions that are affected by localization, which we’ll learn more about later in this lesson. You can see how the standards organization W3C defines internationalization and localization.
You’ll often hear of these terms described with the following acronyms: l10n and i18n. (The first letter of the word, how many letters exist before the last letter of the word, and the last letter of the word. The acronyms are even harder to say and confusing to see. Sigh.) These acronyms are often used in the naming of libraries that help us achieve internationalization and localization goals.
Detecting a User’s Locale
If we want to localize our application, the first thing we need to do is detect what locale your user prefers. A locale denotes a bit more than just language – it also signifies cultural preferences in how the language should be expressed.
Locales are formatted as language[-region]. So for example, en represents the English language, while en-US represents English in the United States, and en-GB represents English in Great Britain. Differences you’d notice per region in this example might be that words like ‘favorite’ would be spelled ‘favourite’ if you are in the en-GB locale.
Client-Side Detection
We could detect the user’s language preference on the client-side, though we have to be aware of differences among browsers. For example:
// IE
if (navigator.browserLanguage) {
    console.log(navigator.browserLanguage);
}
// All other vendors
else if (navigator.language) {
    console.log(navigator.language);
}
If you log navigator.language in your browser console, you’ll likely get a string back that says ‘en-US’. This locale value is what we’d like to reference when trying to determine what language to display our application in.
Besides having to account for differences among browsers, detecting the locale on the client-side only gives us a single locale. In reality, most browsers support ranking multiple languages in your preference settings. In Chrome, you can see this by going into Settings > Show Advanced Settings... > Language and Input Settings...:
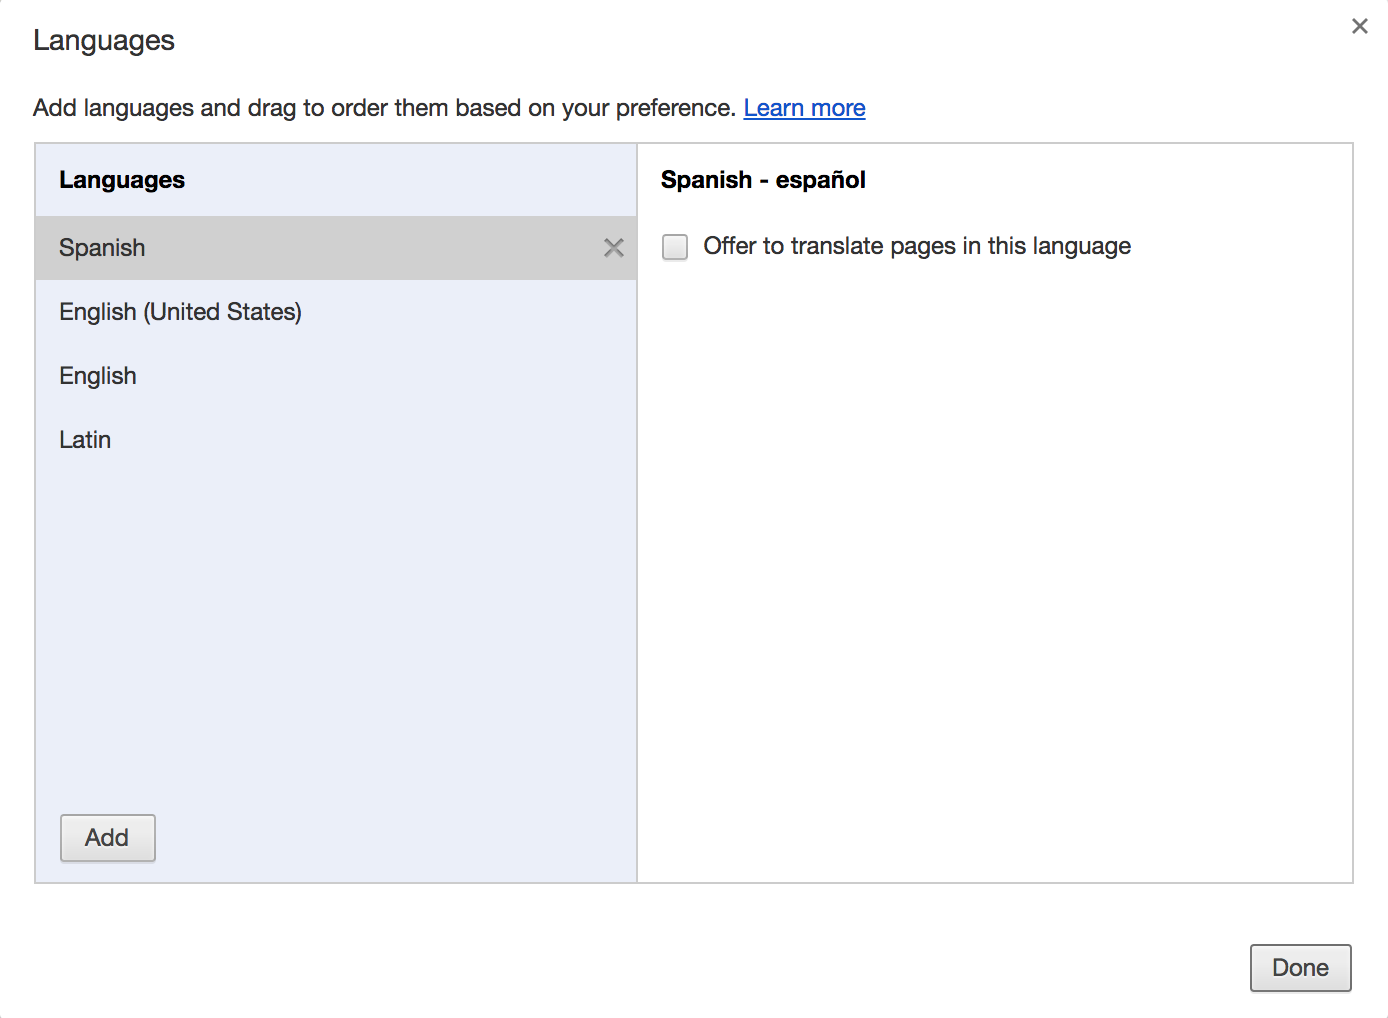
We might need this ranked list if a user’s top locale isn’t supported by our application. Unfortunately, we can’t get all of this information from the client-side, so it’s often better to do your detection on the server-side.
Server-Side Detection
On the server-side, we can gain access to an entire array of acceptable locales that the user has set in their browser preferences. This will allow us to fall back to a secondary locale if we don’t support their first choice. (e.g. if their top locale is Chinese, and their second is Spanish, and our app has not been translated to Chinese, we could still serve up a Spanish version)
Practice: On Your Own
Let’s take a look at how to do this. Make a new directory and npm init --yes a new project. Install express and set up a server file that will have the app listen on port 3000. Add a single route:
app.get('/', function(req, res) {
  let acceptedLocales = req.header('Accept-Language');
  res.send(`Locales: ${acceptedLocales}`)
});
If we now try to hit the root of our application, we’ll see a string displayed that includes all of our ranked locales:
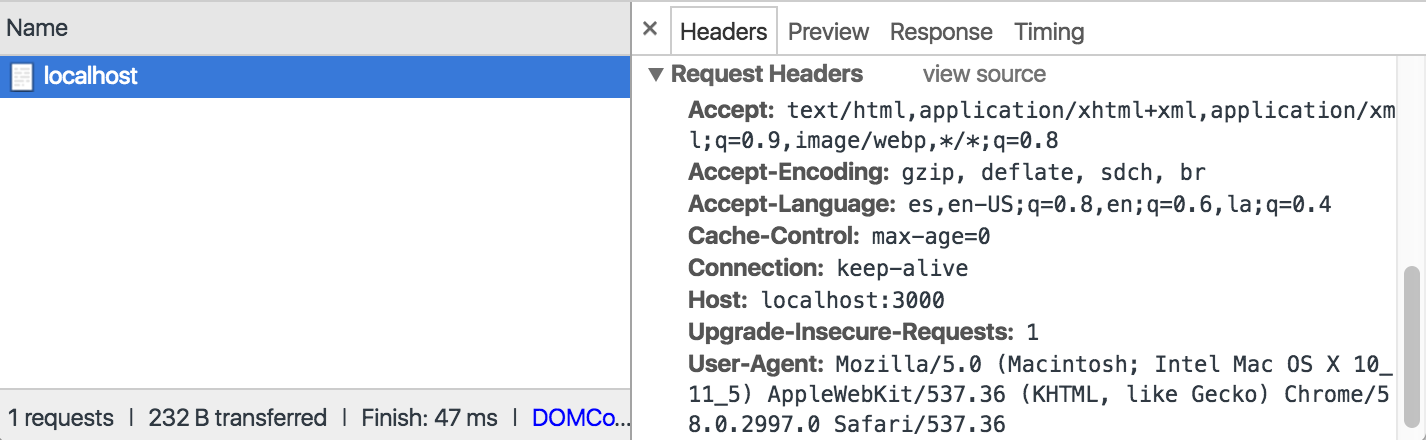
Locales: es,en-US;q=0.8,en;q=0.6,la;q=0.4
The ;q=0.8 parameter simply denotes the quality/level of acceptance for this particular locale. (e.g. in this string, a user would prefer an en-US over la). In this case, es gets a default quality value of 1.0. You can check out the ISO standard for language codes.
This req.header('Accept-Language') value is given to us as a request header (similar to when you’ve specified Authorization headers or Accept-Content headers) automatically by the browser. If we look at our request in the browser dev tools, we can see this information has been passed through for us by the browser:
Setting up for Localization
Remember we said internationalization was the process of configuring our application to perform translations/localizations. This configuration requires a couple of different steps:
- Determining the user’s current locale
- Specifying which locales our application supports
- Creating translation files our application can pull from to display the right text
Leverage an i18n Library
An i18n library will help us accomplish some of these steps, and abstract away some of the more difficult logic. In this example we’ll use i18n-node.
Practice: On Your Own
Install the i18n library and create a new file at the root of your application called i18n.js. This will serve as middleware for our application to assist us in the localization process.
This file should require in the i18n module and set the following configurations:
- Support the
en-USandeslocales - Set our locales directory to
__dirname + '/locales' - Set the default locale to
en-US - Rename the
__API method totranslate - Set the URL query parameter to override the locale to
lang
Finally, we want to initialize the the library and finish sending the request through:
const i18n = require('i18n');

i18n.configure({
  // set i18n configuration
});

module.exports = function(req, res, next) {

  // initialize the i18n library
  i18n.init(req, res);

  return next();
};
To apply our middleware, we’ll want to include this new file into our server file, and incorporate it with app.use():
const i18n = require('./i18n');

app.use(i18n);
Create Your Translation Files
Building translation files is currently a very manual process. Translation files are simple JSON files, where each key is an identifier for a piece of text to be displayed on the page, and each value is the translation of that text. For example, a translation file for our Spanish app would be named es.json and might look like this:
{
  "title": "¡Localización!",
  "description": "Necesito practicar mi Español"
}
This may seem simple enough, but imagine all of the text you might have on your application. These files will get very large very fast. Not to mention, you have to continuously update every translation file for each locale you support. Though there are libraries that support creating a template for your translation files that will automatically add any new keys to each JSON file, the translation for each key must still be done manually.
Services such as Google Translate are constantly improving, but the inaccuracies that still exist usually pose too great a risk to justify automatically translating your application. Most companies will either hire a translation team to do this work manually, or, rely on the help of the community to submit translations as they are able. (For example, Mozilla’s Support Application allows users to translate any article on the page and submit it to the database.)
Practice: On Your Own
Remember in our i18n middleware, we specified a locales directory in the configuration option. This is where we want all of our translation JSON files to live. Create this directory at the root of your application, and add two JSON files: en-US.json and es.json. Both of these files will map to the supported locales we specified in our i18n configuration.
Add a title and description key to each JSON file, and set their values equal to whatever you’d like – just put them in the correct language!
Serving up the Localization
Now that our app is configured to support two different locales, we need to actually serve up different versions of our files based on what locale a user is in.
This is a great use case for using server-side templates. Because we’re going to be dynamically generating multiple parts of our content, and because we’re already detecting locale on the server-side, it makes sense to use a template engine such as EJS.
Practice: On Your Own
Install the EJS module and set it as your view engine in your server file:
app.set('view engine', 'ejs');
Next, create a views directory and an index.ejs template that will display our title and description:
<html lang="<%= locale %>">
  <head>
    <title><%= translate('title') %></title>
  </head>
  <body>
    <h1><%= translate('title') %></h1>
    <h3><%= translate('description') %></h3>
  </body>
</html>
To present this template when a user visits our app, we’ll want to adjust our route to render index.ejs:
app.get('/', function(req, res) {
  res.render('index.ejs');
});
Now when you visit your application, you should see your rendered template with localized strings. If you adjust your browser language settings, you’ll notice that the localized strings change based on your top locale choice.
Design Patterns & Other Considerations
URLs
You’ll often notice localized applications provide you with a locale identifier directly in the URL. For example, on Fedex.com, you can manually select which location you’d like to view the site in. If we select ‘Spain’ from the drop down menu, we can see that we actually get redirected to https://spain.fedex.com/#/Main?lang=es. By using a query param in our URL to set the language, we can override any autodetection for locale and have more control over how the site content is displayed. So even if my default browser settings say to prefer English, if I decide I want to view the Spanish version of a website, I can still do that so long as the URL has an identifier in place.
RTL Locales
Some languages, such as Arabic, are read right-to-left. Another attribute you might notice on the html tag is dir. This stands for ‘direction’ and should either be set equal to ltr (left-to-right) or rtl (right-to-left). There are significant design implications when localizing a web app for an RTL language. You’ll notice if you were to view Wikipedia in Arabic, all of the text is aligned on the right, and almost the entire website is mirrored horizontally:
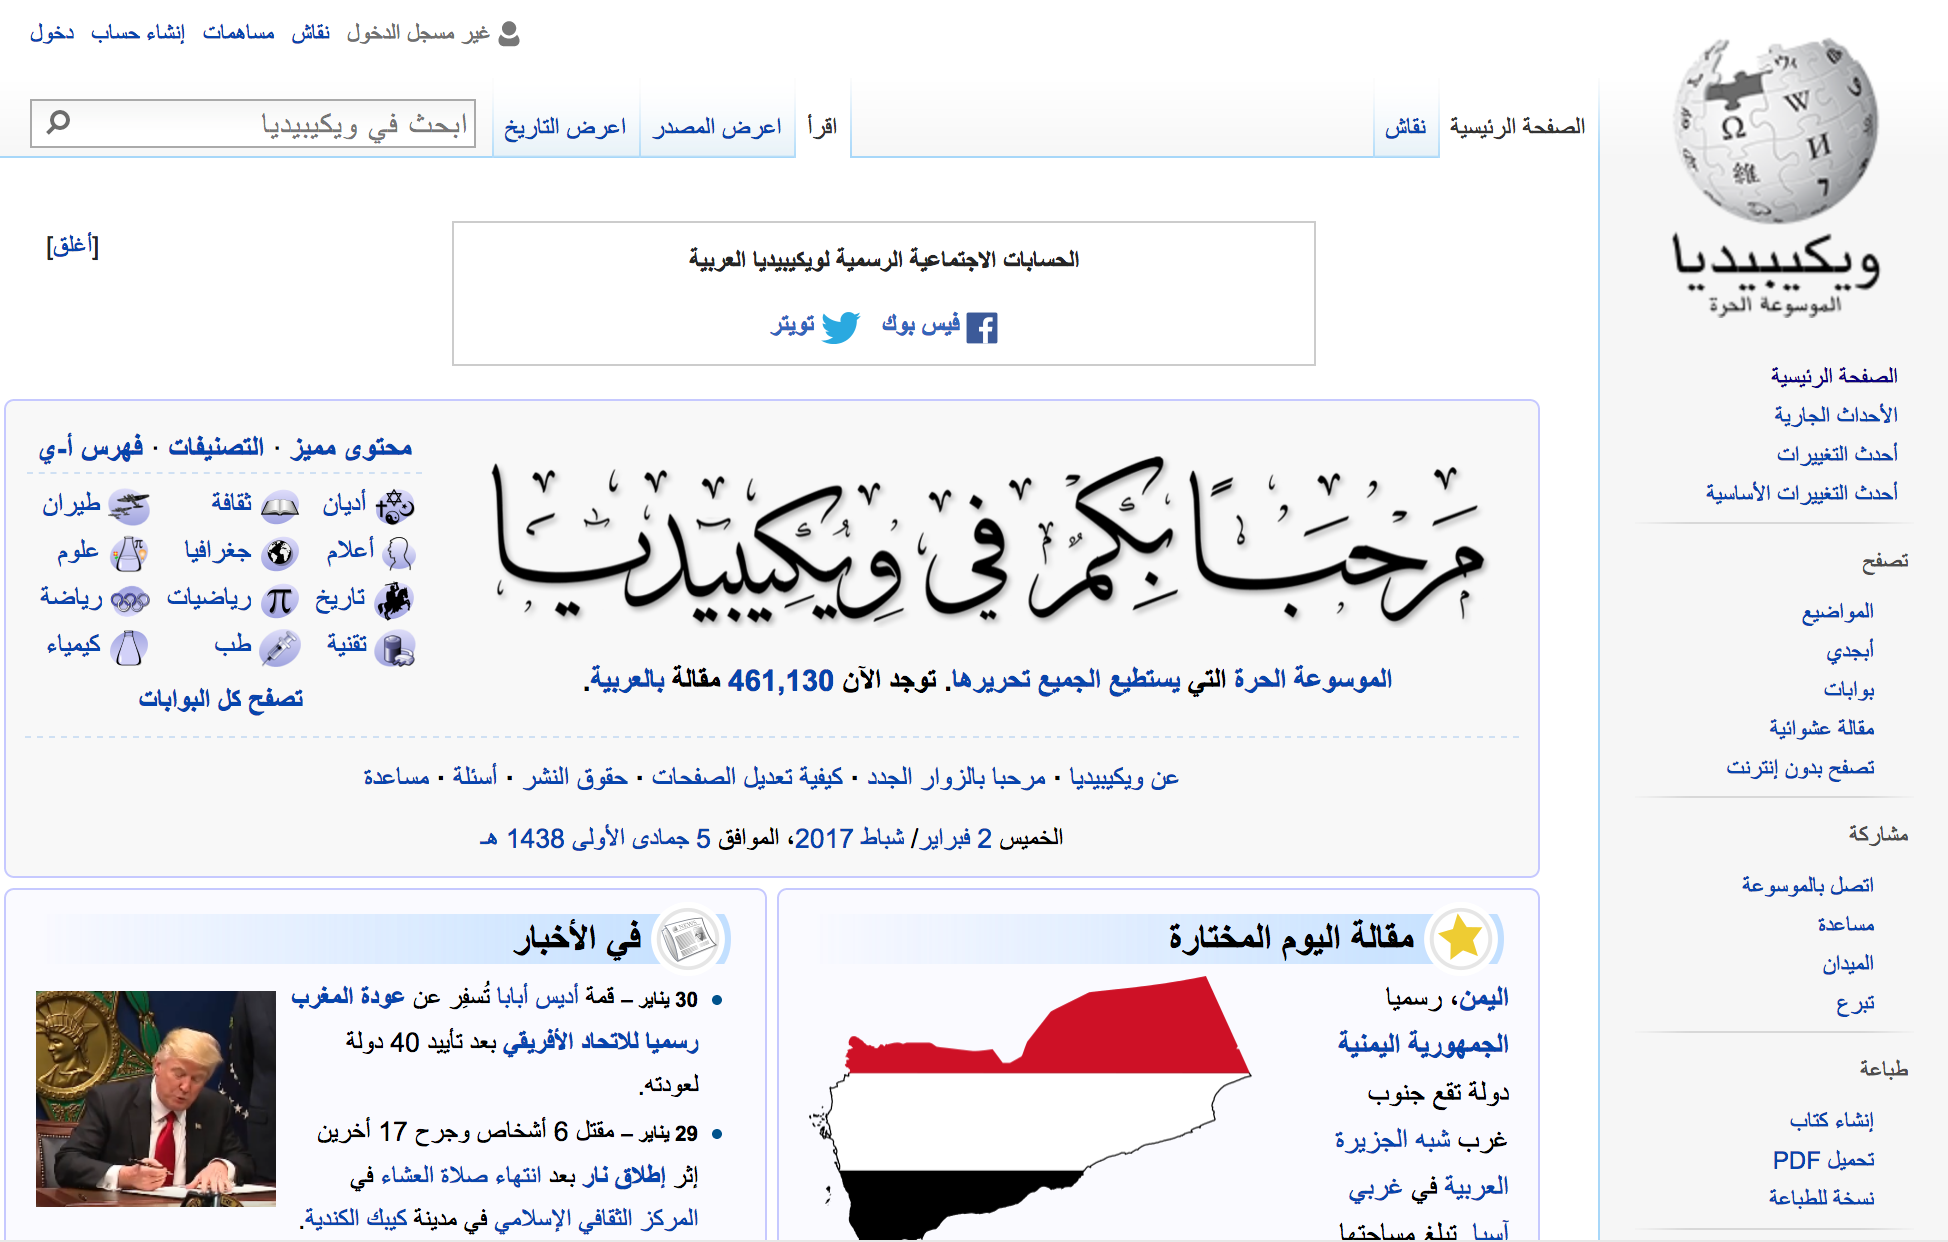
This provides a more familiar layout for RTL readers, although it may look incredibly bizarre to us. Facilitating this mirror image layout is simply a matter of having that attribute on the HTML or body tag of each page. While you can also use CSS, it is recommended to use the HTML attribute in case the CSS fails for any reason (e.g. it does not load, someone has styles turned off)
Simplifying Partially-Localized Pages
If you don’t have a fully complete localization for a particular language, you might want to consider hiding the parts of your application that have not yet been translated. They would likely be less useful and even more confusing for users that don’t understand the language.
Images
Avoid using images that include text. Sometimes logos are an exception, but prefer using CSS to position text over images if required.
Dates, Numbers and Currencies
Besides translating our text strings, we also need to keep other data points in mind such as dates, numbers, and currencies. These are often formatted differently based on locale, and we want to make sure they read in an appropriate manner.